

Blogs
How to Polish Acrylic Sheet Edges for a Professional Finish

Acrylic sheets are widely used for signage, retail displays, partitions, lightboxes, furniture components, protective covers, exhibition stands, decorative panels, and architectural applications. One of the most noticeable details after acrylic fabrication is the condition of the sheet edges. Even a precisely cut acrylic panel can look unfinished when the edges are rough, cloudy, scratched, or uneven.
Polishing acrylic sheet edges transforms a cut edge into a smoother and more visually refined surface. Depending on the application, the edge can be finished with sanding, buffing, flame polishing, or diamond polishing. The right technique depends on the acrylic type, sheet thickness, cutting method, desired appearance, available equipment, and whether the edge will be visible or illuminated.
For professional acrylic fabrication, edge finishing is not simply a cosmetic step. It can improve the appearance of displays and fabricated products while helping create clean transitions between panels and components.
Why Acrylic Sheet Edges Need Polishing
When acrylic is cut with a saw, router, laser cutter, CNC machine, or other fabrication equipment, the resulting edge can have different characteristics.
A saw-cut edge may contain small machining marks.
A router-cut edge can have visible tool paths.
A CNC-cut edge may require additional finishing depending on the cutting parameters.
A laser-cut edge can sometimes appear glossy and transparent, although excessive heat may create undesirable marks, stress, or discoloration.
Polishing removes or reduces visible imperfections and creates a more uniform edge.
For transparent acrylic, polished edges can become especially attractive because light travels through the material and can produce a bright, glass-like appearance.
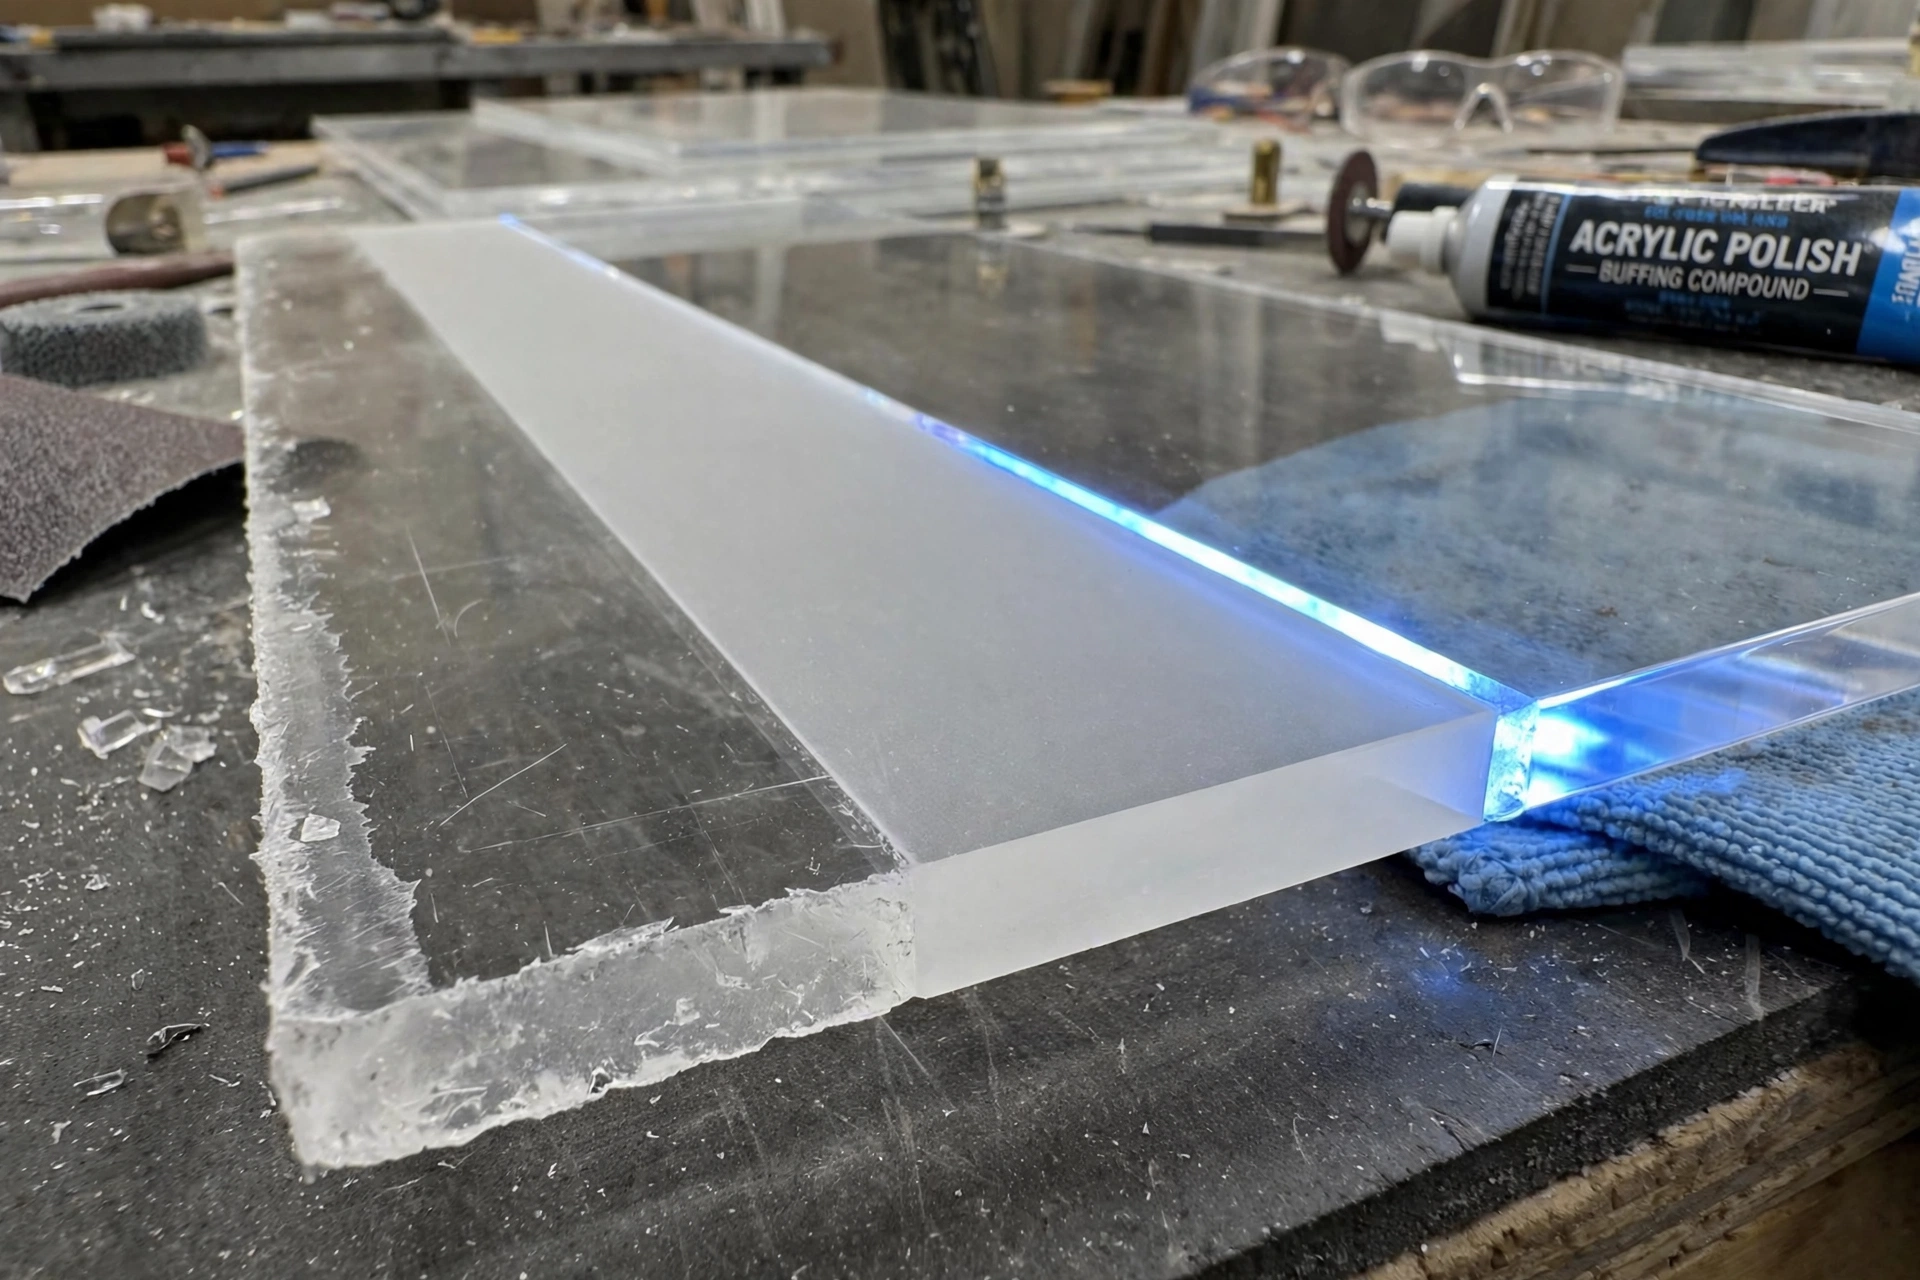
What Makes a Professional Acrylic Edge Finish?
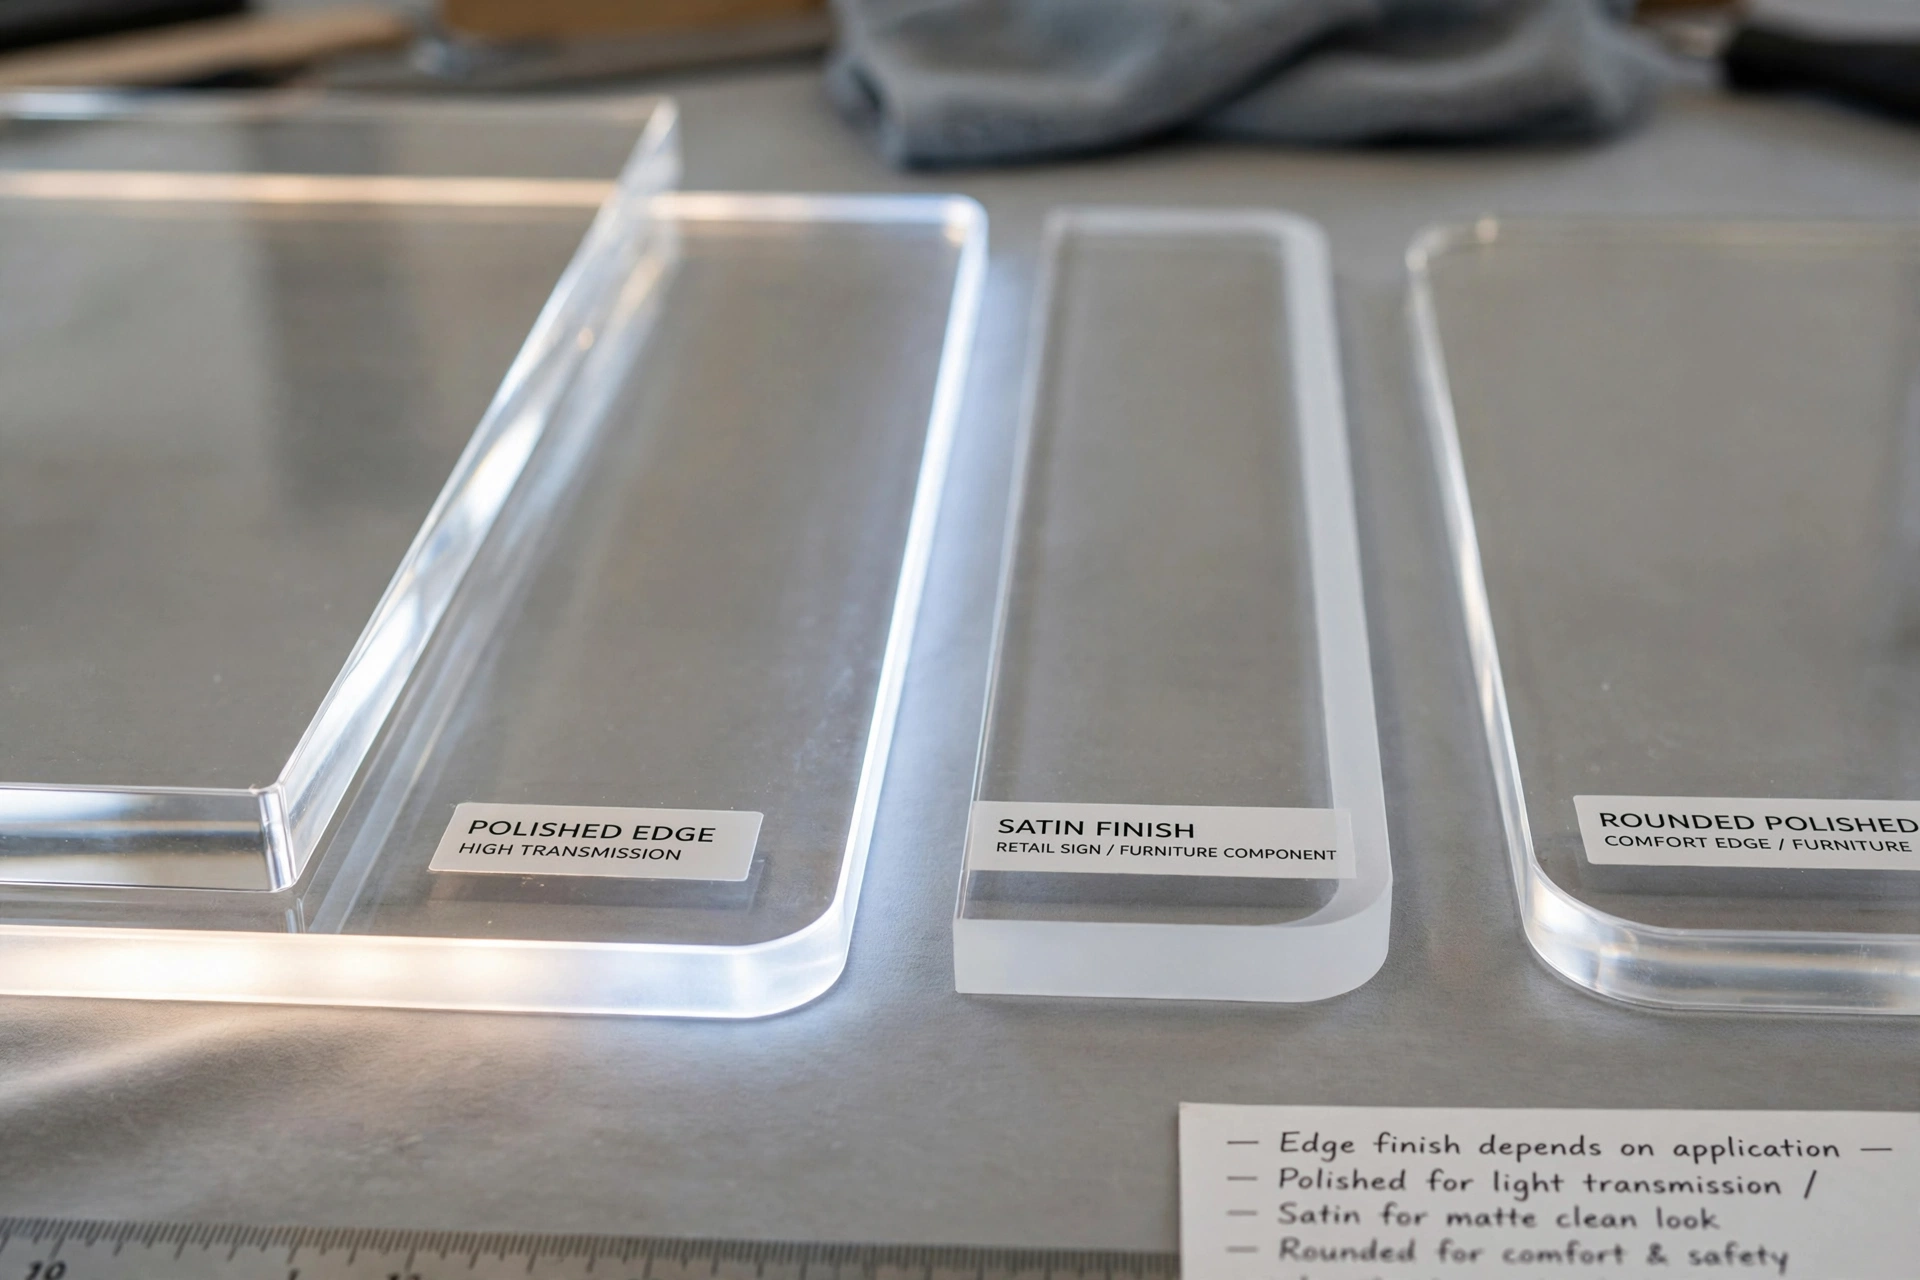
A professional acrylic edge should generally appear smooth, consistent, and free from obvious scratches or machining marks.
The exact finish depends on the application.
For a clear display panel, a highly transparent polished edge may be desirable.
For a retail sign, a clean satin finish may be sufficient.
For a fabricated furniture component, the edge may need to be rounded slightly for both appearance and comfort.
For an illuminated acrylic sign, the edge may be intentionally polished to improve light transmission.
Professional finishing therefore begins by determining what the finished acrylic product needs to achieve.
Understanding Acrylic Sheet Types
Before polishing an edge, it is important to understand the acrylic being used.
Acrylic is commonly available as cast or extruded sheet.
Cast acrylic is produced by casting liquid methyl methacrylate between plates and polymerizing it. It is commonly used for signage, displays, architectural applications, and fabrication where machining and finishing characteristics are important.
Extruded acrylic is produced through an extrusion process. It can provide consistent thickness and is widely used for glazing, displays, protective panels, and fabricated products.
Both types can be polished, but their machining and thermal behaviour can differ.
Colour also matters.
Clear acrylic behaves differently visually from opaque white, black, frosted, tinted, fluorescent, or mirrored acrylic because edge imperfections may be more or less visible.
Tools Required for Acrylic Edge Polishing
The appropriate tools depend on the required finish and fabrication method.
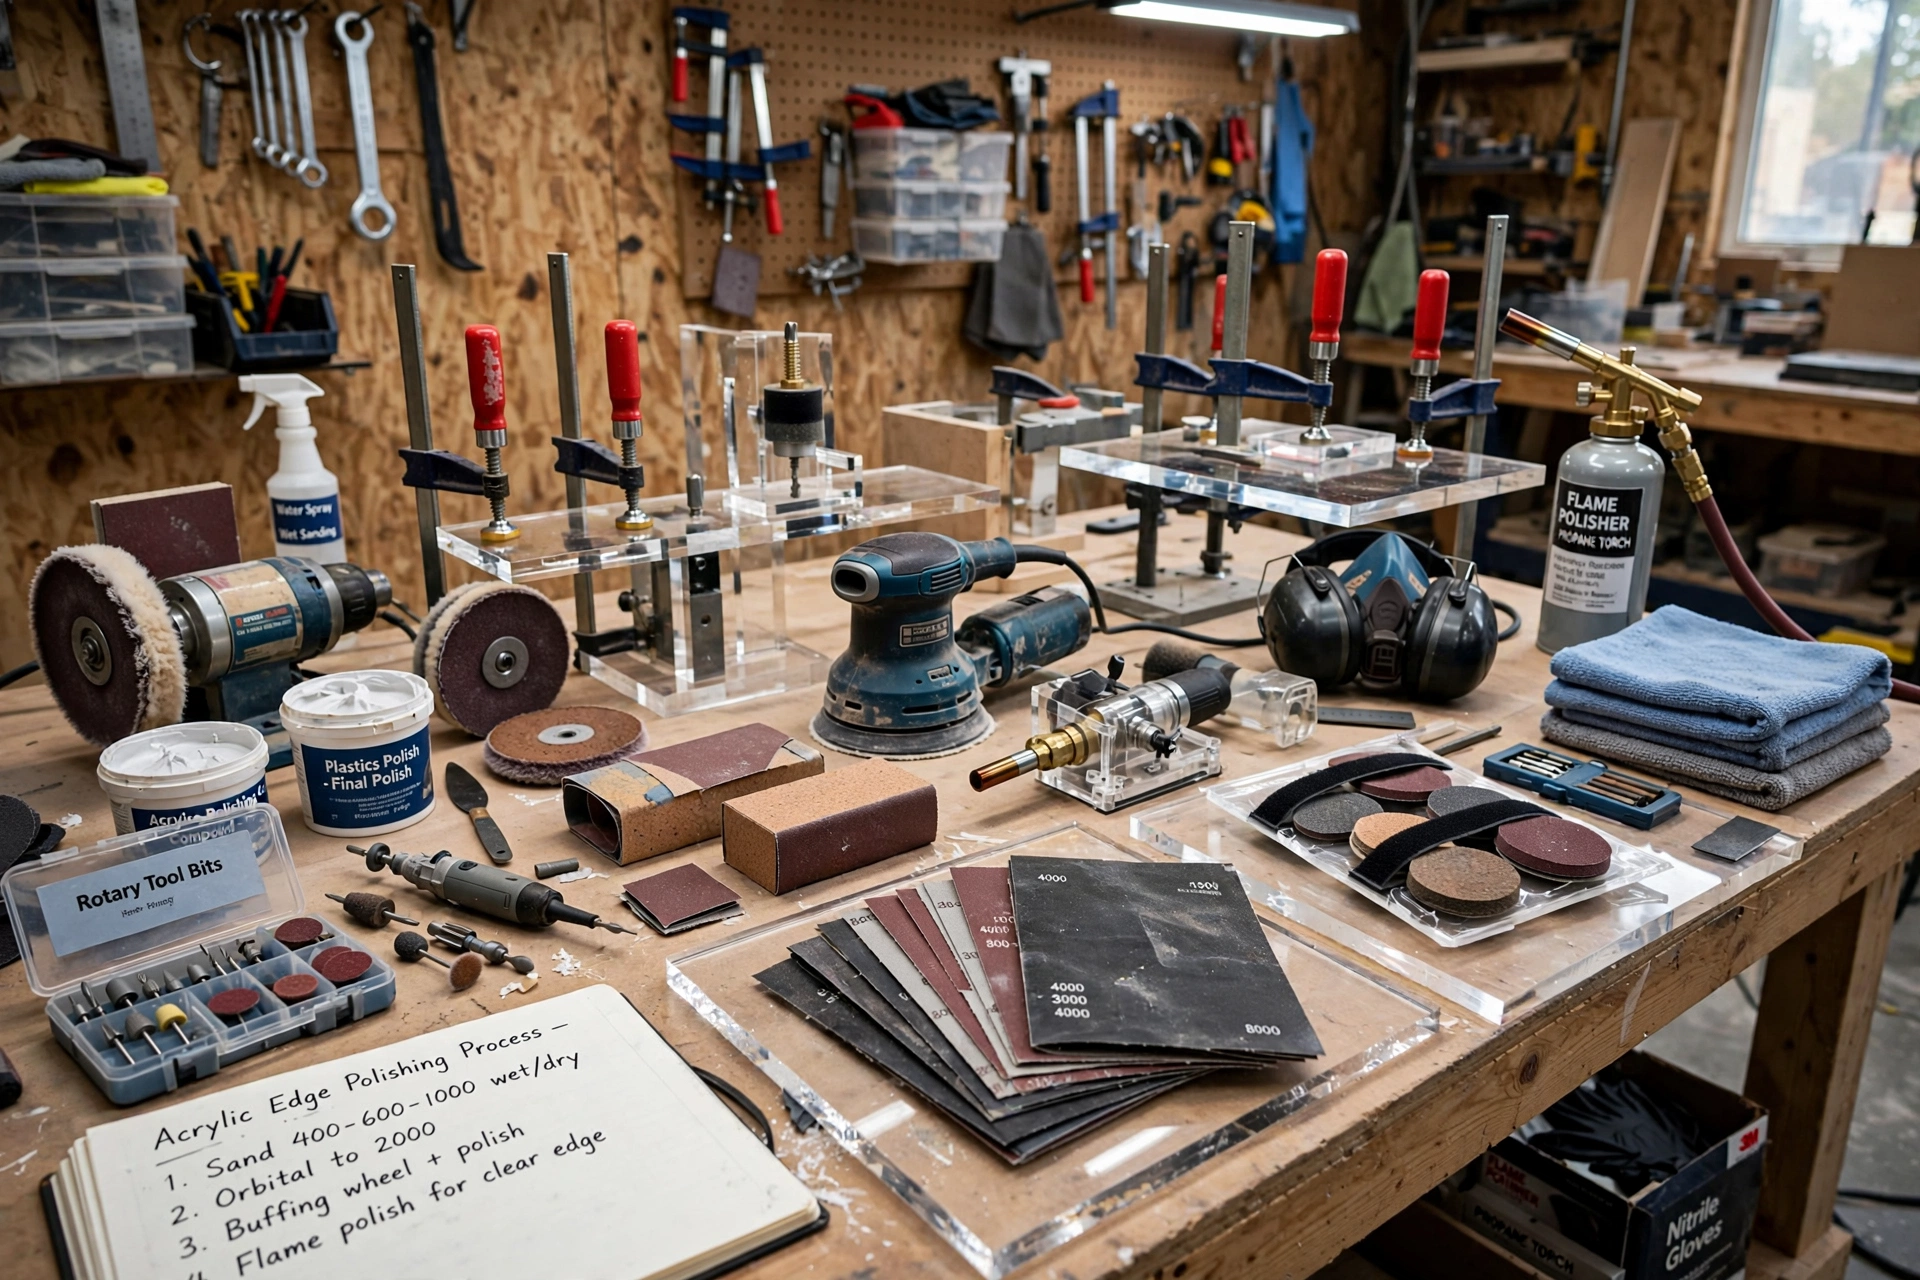
Common tools and equipment include:
- Sandpaper
- Sanding blocks
- Orbital or finishing sanders
- Wet-and-dry abrasive paper
- Buffing wheels
- Polishing compounds
- Rotary tools
- Routers
- Flame-polishing equipment
- Diamond polishing equipment
- Clean microfiber cloths
- Protective equipment
- Clamps and workholding fixtures
The quality of the final result depends not only on the tool but also on the preparation of the edge.
A poor cut cannot always be corrected quickly through polishing.
Step 1: Inspect the Acrylic Edge
The first step is to inspect the cut edge.
Look for:
- Saw marks
- Router lines
- Scratches
- Chips
- Burrs
- Uneven sections
- Heat damage
- Cloudiness
- Cracks
Running a finger carefully along the edge can help identify rough sections, although sharp acrylic edges should be handled carefully.
The edge should be reasonably straight before polishing begins.
If there are deep machining marks or chips, these should be removed through controlled sanding or machining rather than trying to polish them away immediately.
Step 2: Secure the Acrylic Sheet
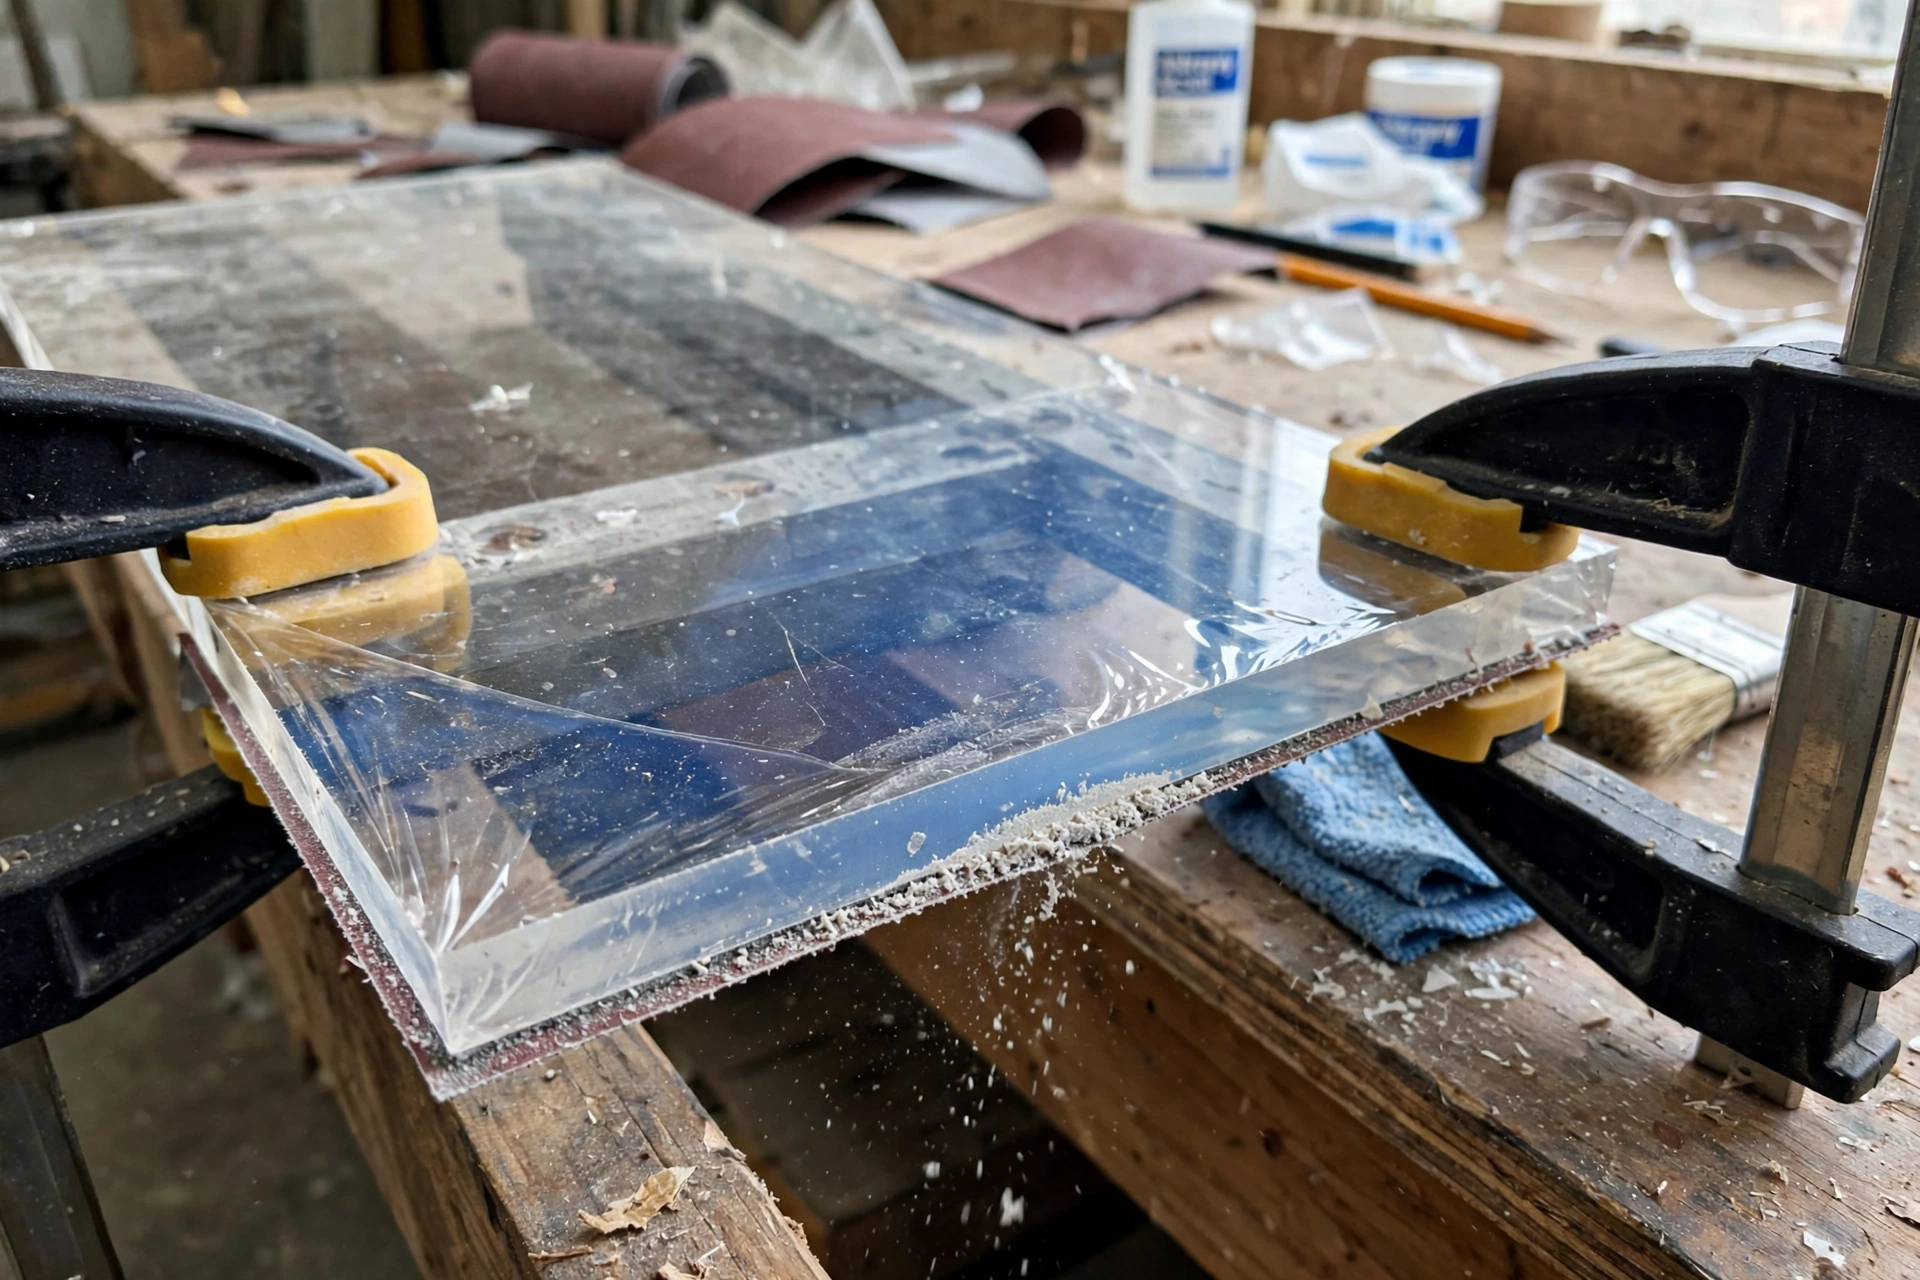
The acrylic sheet should be held securely during finishing.
Movement during sanding or polishing can produce uneven edges and accidental scratches.
Use appropriate clamps or a suitable workholding system.
Protect the visible faces of the acrylic from contact with abrasive surfaces, metal clamps, dust, and debris.
Acrylic can scratch relatively easily, so cleanliness is important throughout the process.
Step 3: Remove Rough Machining Marks
If the edge is rough, sanding is usually the first finishing stage.
Begin with an appropriate abrasive depending on the severity of the marks.
A coarse abrasive can remove deeper machining imperfections, while progressively finer abrasives are used to refine the surface.
Avoid removing excessive material.
The objective is to create a straight and uniform edge rather than significantly changing the dimensions of the acrylic panel.
Step 4: Progress Through Finer Abrasives
Once the major marks have been removed, move toward finer abrasive grades.
The exact sequence depends on the starting condition of the edge and the desired finish.
A typical progression might move from medium abrasive paper toward fine and very fine grades.
Each stage should remove the marks created by the previous abrasive.
This is important because moving directly from a coarse abrasive to polishing compound can leave visible scratches.
The edge should become increasingly uniform as the abrasive grade becomes finer.
Wet Sanding Acrylic Edges
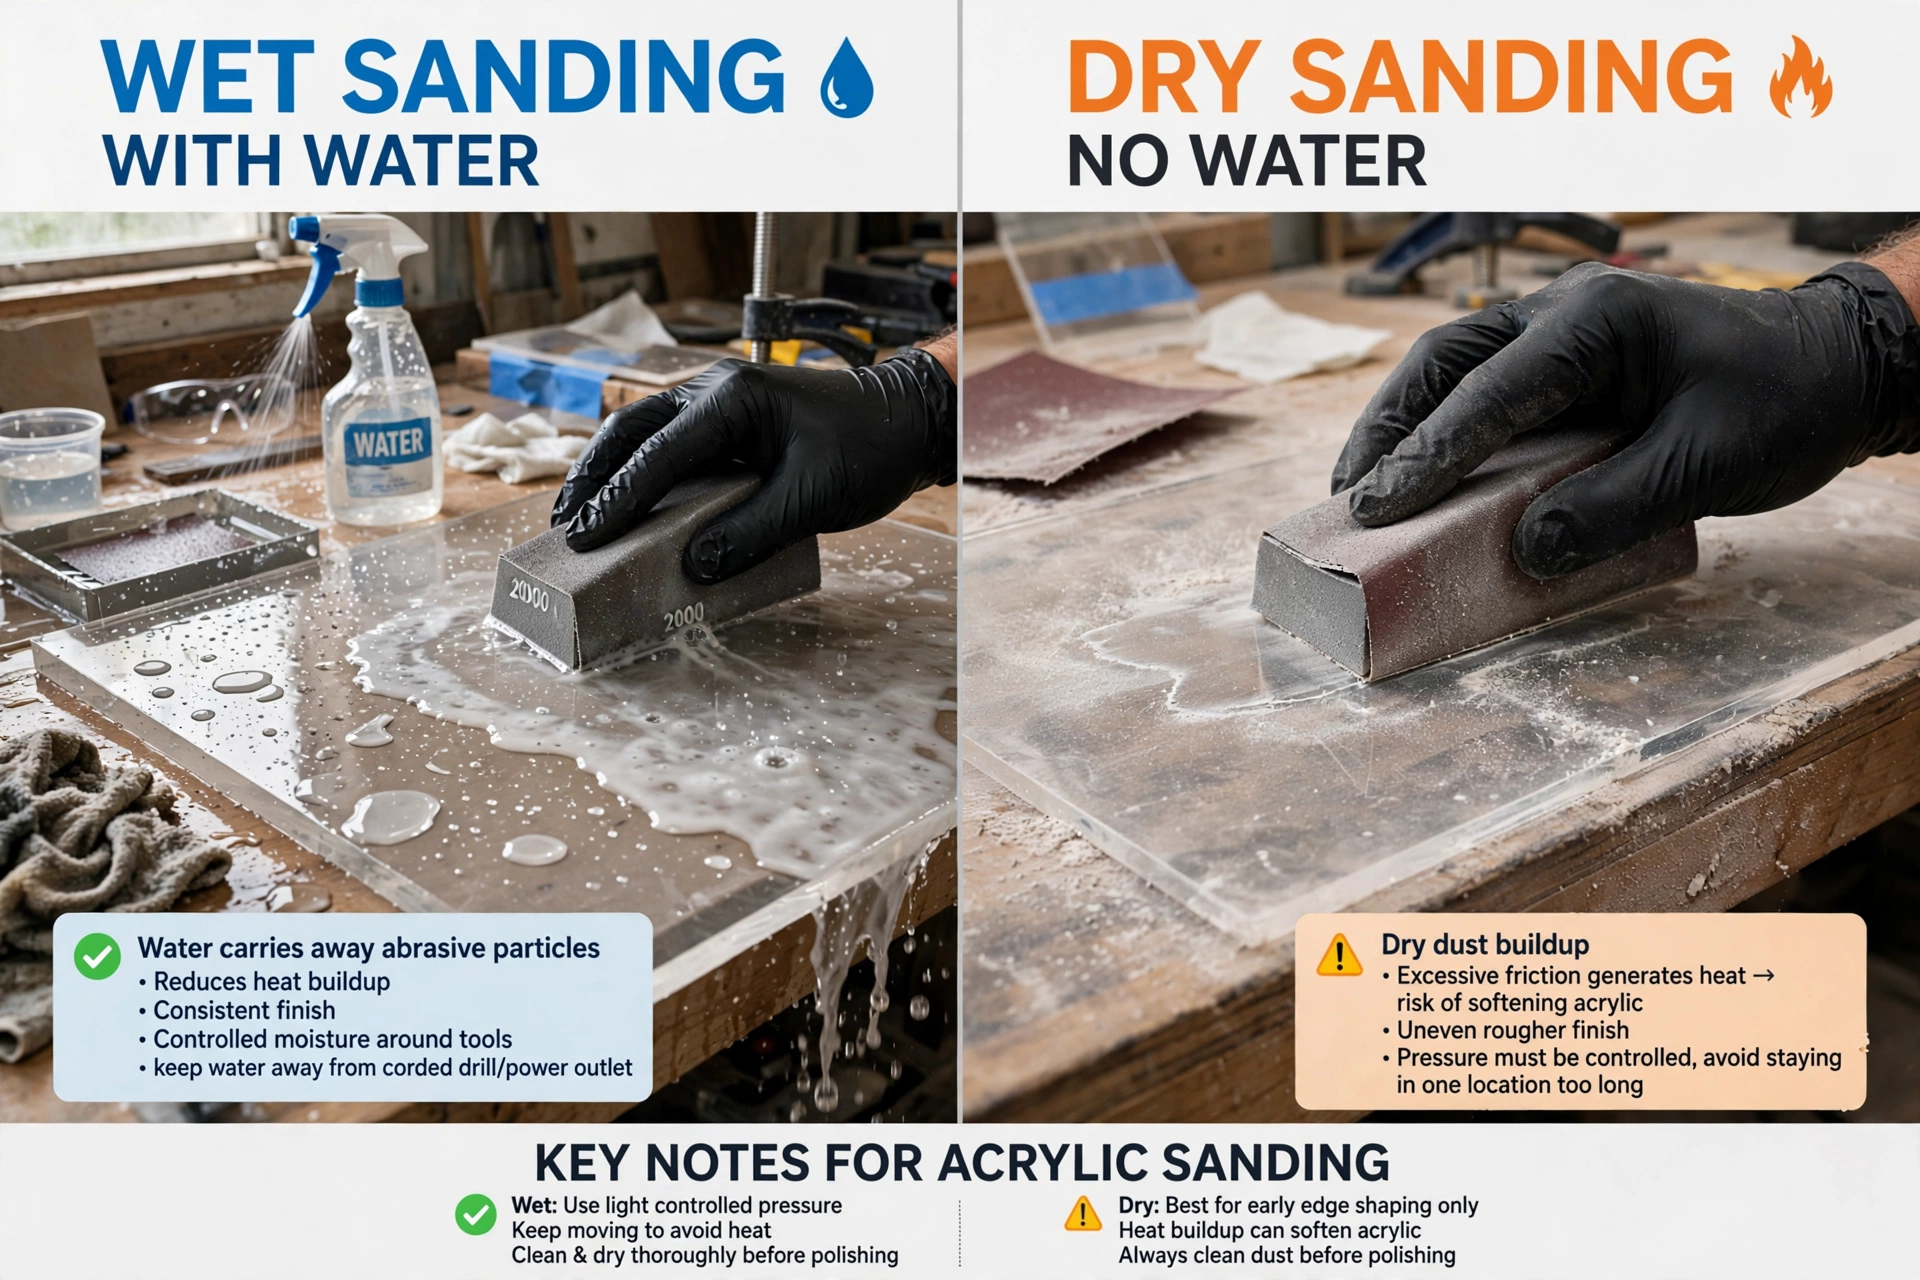
Wet sanding can be useful when refining acrylic surfaces.
Water helps carry away abrasive particles and can reduce heat buildup.
It can also help create a more consistent finish when working through fine abrasive stages.
However, moisture should be controlled carefully around electrical tools and equipment.
After wet sanding, the acrylic should be thoroughly cleaned and dried before subsequent polishing.
Dry Sanding Acrylic Edges
Dry sanding can also be used, particularly during earlier stages of edge preparation.
The main consideration is heat.
Excessive friction can generate heat and potentially soften the acrylic surface.
Use controlled pressure and avoid staying in one location for too long.
A sanding block can help maintain a consistent edge profile on straight sections.
Step 5: Clean the Edge Between Stages
Cleaning between abrasive stages is important.
Particles from a coarse abrasive can become trapped against the acrylic during finer sanding and create unwanted scratches.
Use a clean, suitable cloth and remove dust and debris before moving to the next stage.
Do not drag contaminated materials across the visible acrylic faces.
This is especially important with transparent acrylic because even relatively small scratches can become highly visible under strong lighting.
Step 6: Buffing and Polishing
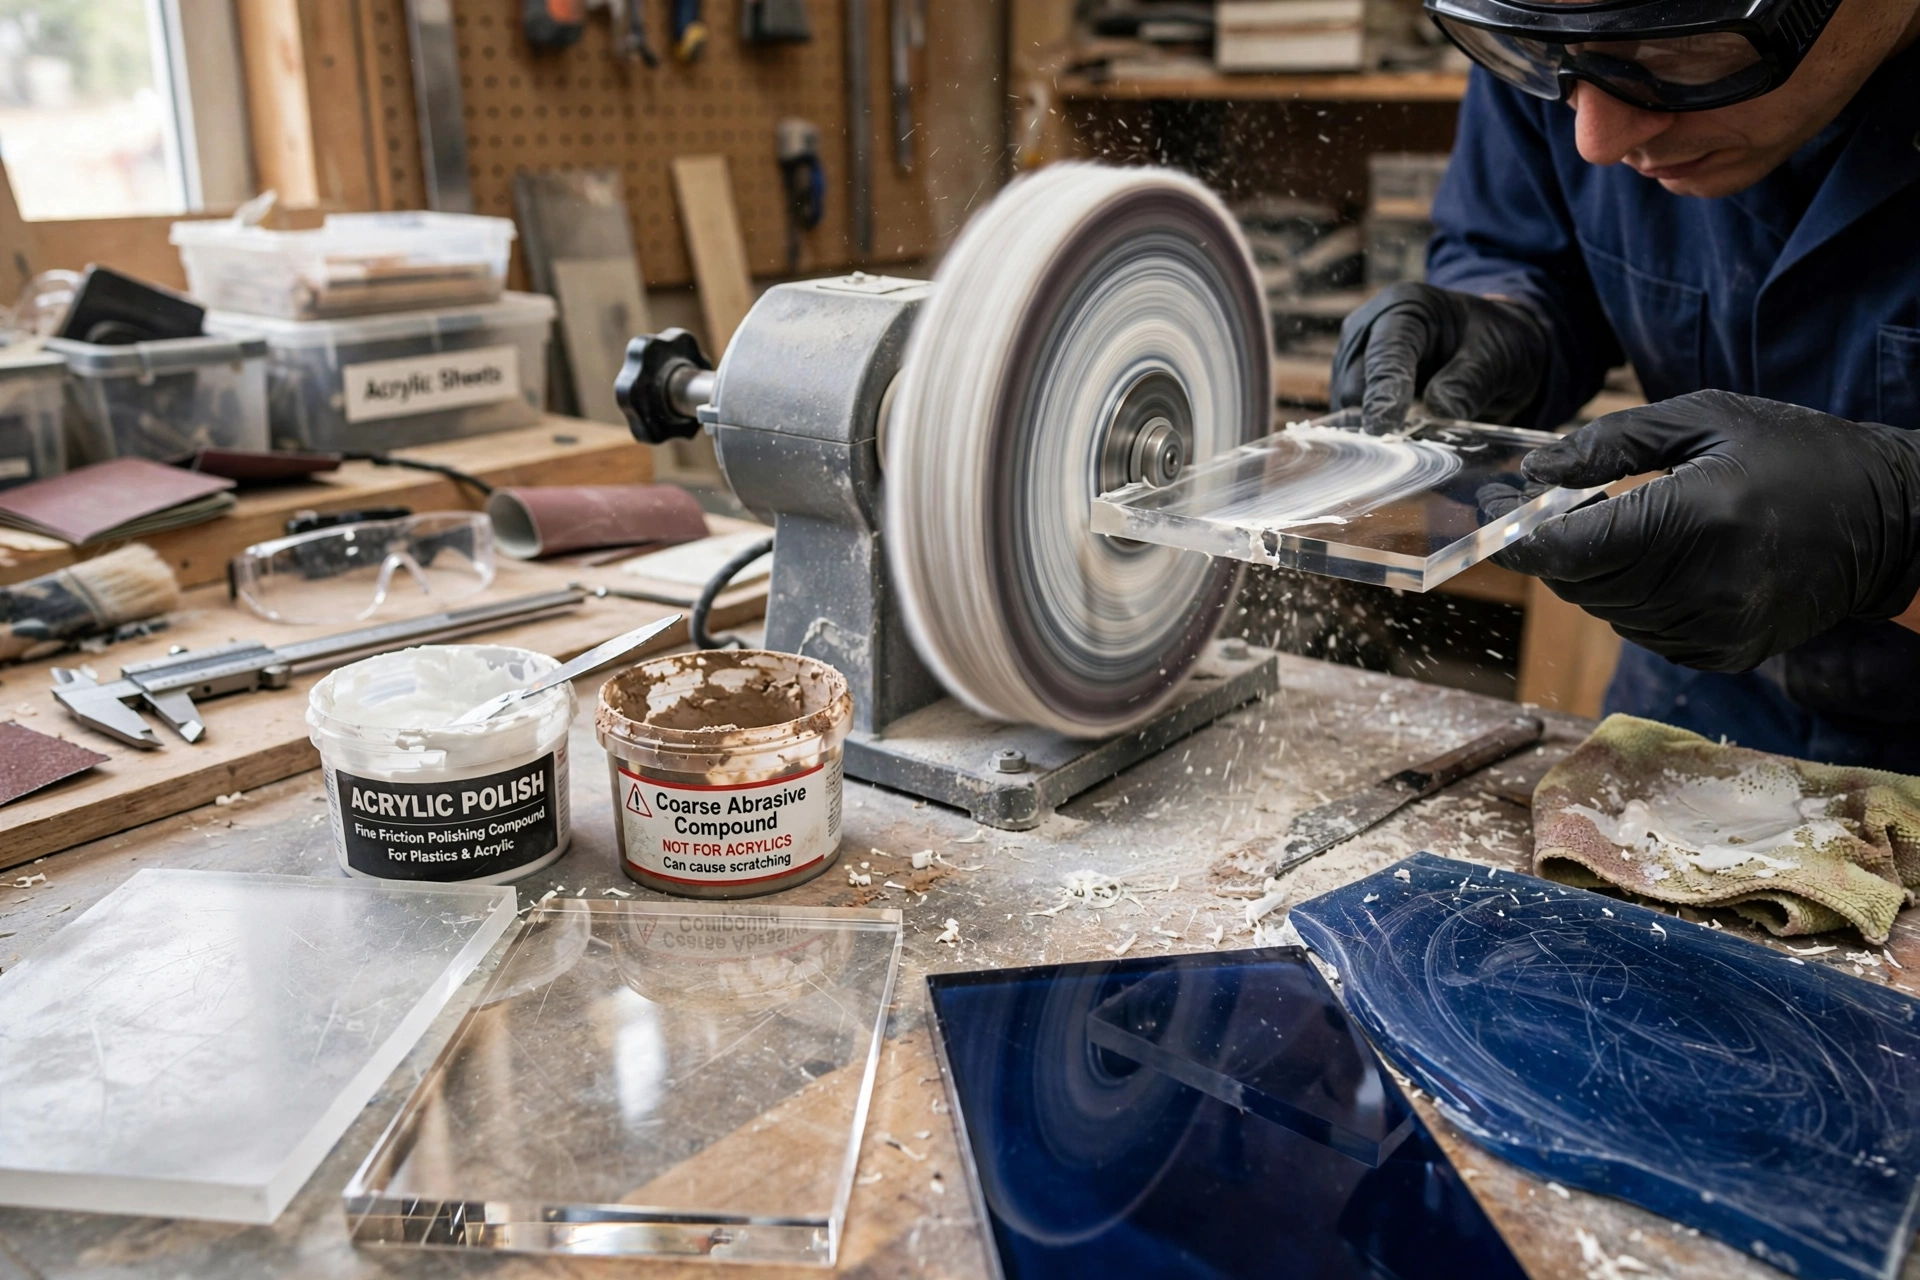
Once the edge has been refined through fine sanding, mechanical polishing can produce a higher-gloss finish.
A polishing wheel combined with an appropriate acrylic polishing compound can smooth the surface further.
The polishing wheel should be used with controlled pressure.
Excessive pressure or prolonged contact can generate heat.
Acrylic is a thermoplastic material, so uncontrolled heat can soften the surface and potentially create distortion.
The operator should allow the edge to cool when necessary.
How Buffing Works on Acrylic
Buffing uses friction and polishing compound to refine the surface.
The process removes very small surface imperfections and creates a more reflective appearance.
For clear acrylic, a properly buffed edge can become highly transparent.
For coloured acrylic, polishing can enhance the visual depth of the material.
The polishing compound should be appropriate for plastics.
Using an unsuitable abrasive compound can introduce scratches rather than remove them.
Flame Polishing Acrylic Edges
Flame polishing is one of the most recognizable techniques for producing a glossy acrylic edge.
A controlled flame is passed over the prepared edge, allowing the surface to soften and reflow slightly.
When performed correctly, the surface can become smooth and glossy.
However, flame polishing requires experience and careful control.
Too much heat can cause:
- Bubbling
- Cracking
- Distortion
- Internal stress
- Discoloration
- Surface damage
Flame polishing is therefore not simply a matter of passing a flame across the edge.
The acrylic must be properly prepared and the heat carefully controlled.
When Flame Polishing Is Appropriate
Flame polishing can be useful for certain clear acrylic applications where a high-gloss transparent edge is required.
It can be particularly attractive for:
- Display products
- Acrylic letters
- Decorative panels
- Awards
- Signage
- Light guides
- Transparent fabricated components
However, flame polishing may not be the preferred solution for every acrylic application.
Some fabricated parts require tighter dimensional control or a specific edge geometry that is better achieved through mechanical polishing.
Diamond Polishing for Acrylic
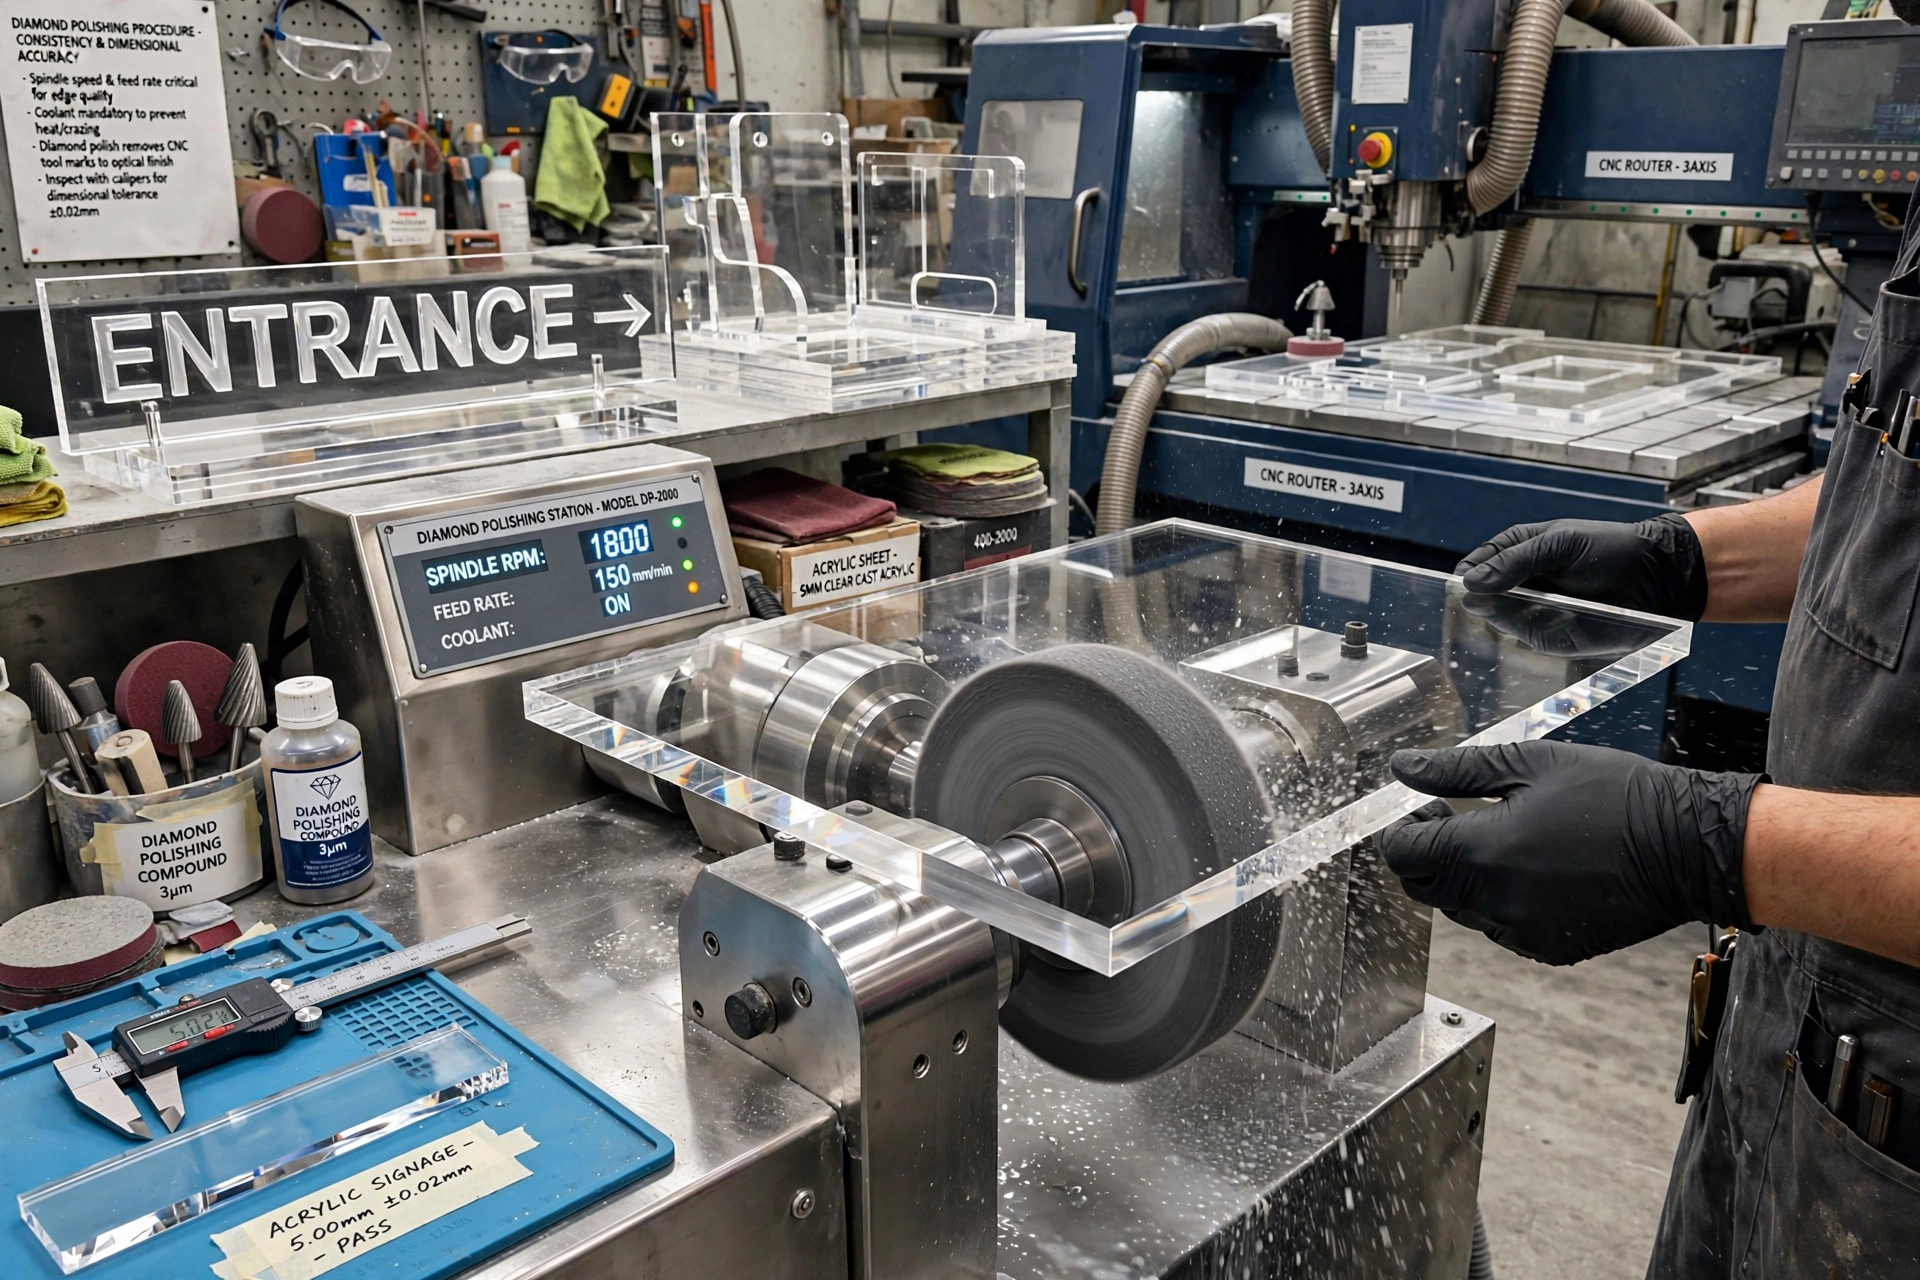
Diamond polishing is another professional method for achieving highly refined acrylic edges.
Diamond tools can produce precise, smooth surfaces with a high-quality appearance.
This method is particularly useful in professional fabrication environments where consistency and dimensional accuracy are important.
Diamond polishing can be used for clear acrylic panels, display components, architectural elements, signage, and other applications requiring a premium finish.
The equipment and setup are more specialized than basic sanding and buffing.
CNC Routing Before Polishing
CNC routing can produce accurately shaped acrylic components.
The quality of the final edge depends on the cutter, spindle speed, feed rate, cooling strategy, and material characteristics.
A properly routed edge can significantly reduce the amount of finishing required.
However, visible tool marks may remain.
These can be removed through sanding, buffing, or other finishing methods depending on the desired result.
CNC fabrication is particularly useful when producing repeated acrylic components with consistent dimensions.
Laser Cutting and Acrylic Edges
Laser cutting is commonly used for acrylic signage, letters, displays, decorative panels, and intricate shapes.
A laser can produce a smooth, visually attractive edge because the material is locally melted during cutting.
For many applications, the laser-cut edge may require little additional finishing.
However, the appearance depends on machine settings, material type, sheet thickness, ventilation, and cutting conditions.
Improper settings can result in excessive heat, frosting, residue, or inconsistent edges.
For premium visible applications, the edge should still be inspected after cutting.
Router-Cut Acrylic Edges
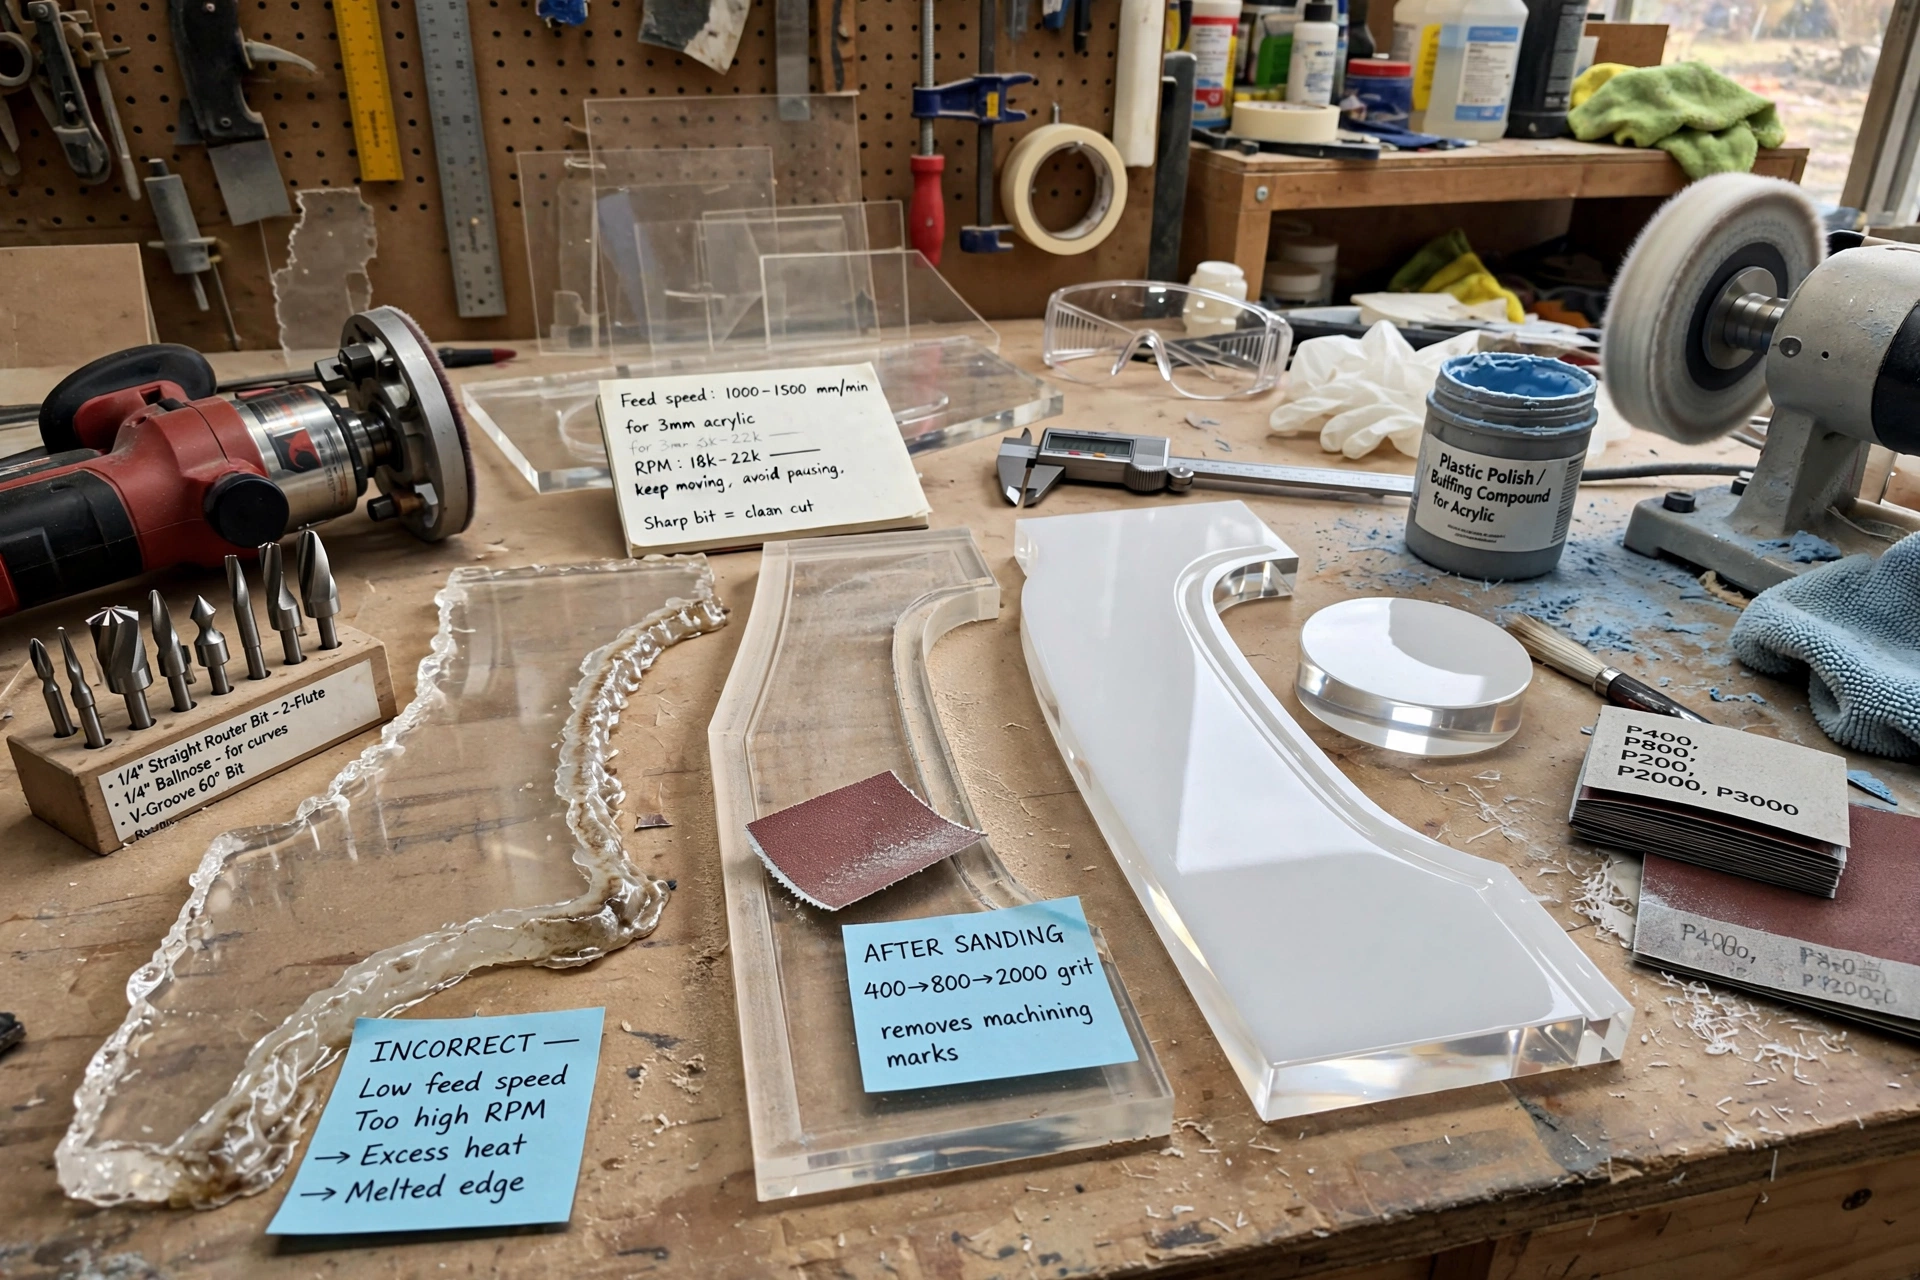
Routing is commonly used when fabricators need straight edges, curves, grooves, profiles, or shaped components.
The router bit should be suitable for acrylic.
Incorrect cutting parameters can generate excessive heat and produce melted edges.
A sharp cutting tool and appropriate feed speed can help achieve cleaner machining.
After routing, the edge can be refined through sanding and polishing.
Choosing the Right Polishing Method
The correct finishing method depends on the project.
Sanding
Best for removing rough machining marks and preparing an edge for further finishing.
Buffing
Suitable for producing a smooth, glossy finish after fine sanding.
Flame Polishing
Can produce a highly glossy appearance on suitable acrylic edges but requires experienced handling.
Diamond Polishing
Suitable for professional fabrication requiring precise and consistent premium finishes.
Laser Cutting
Can produce naturally glossy edges on suitable acrylic materials and thicknesses, although the final result depends heavily on cutting conditions.
No single technique is ideal for every project.
Polishing Thick Acrylic Sheets
Thicker acrylic sheets may require additional attention because the edge is more prominent.
For a thick clear acrylic panel, even small imperfections can be noticeable.
The edge should first be made accurately flat and square.
Fine sanding can then remove machining marks before buffing or another polishing method is applied.
For architectural or display applications, the edge may also be shaped into a specific profile such as a bevel or rounded edge.
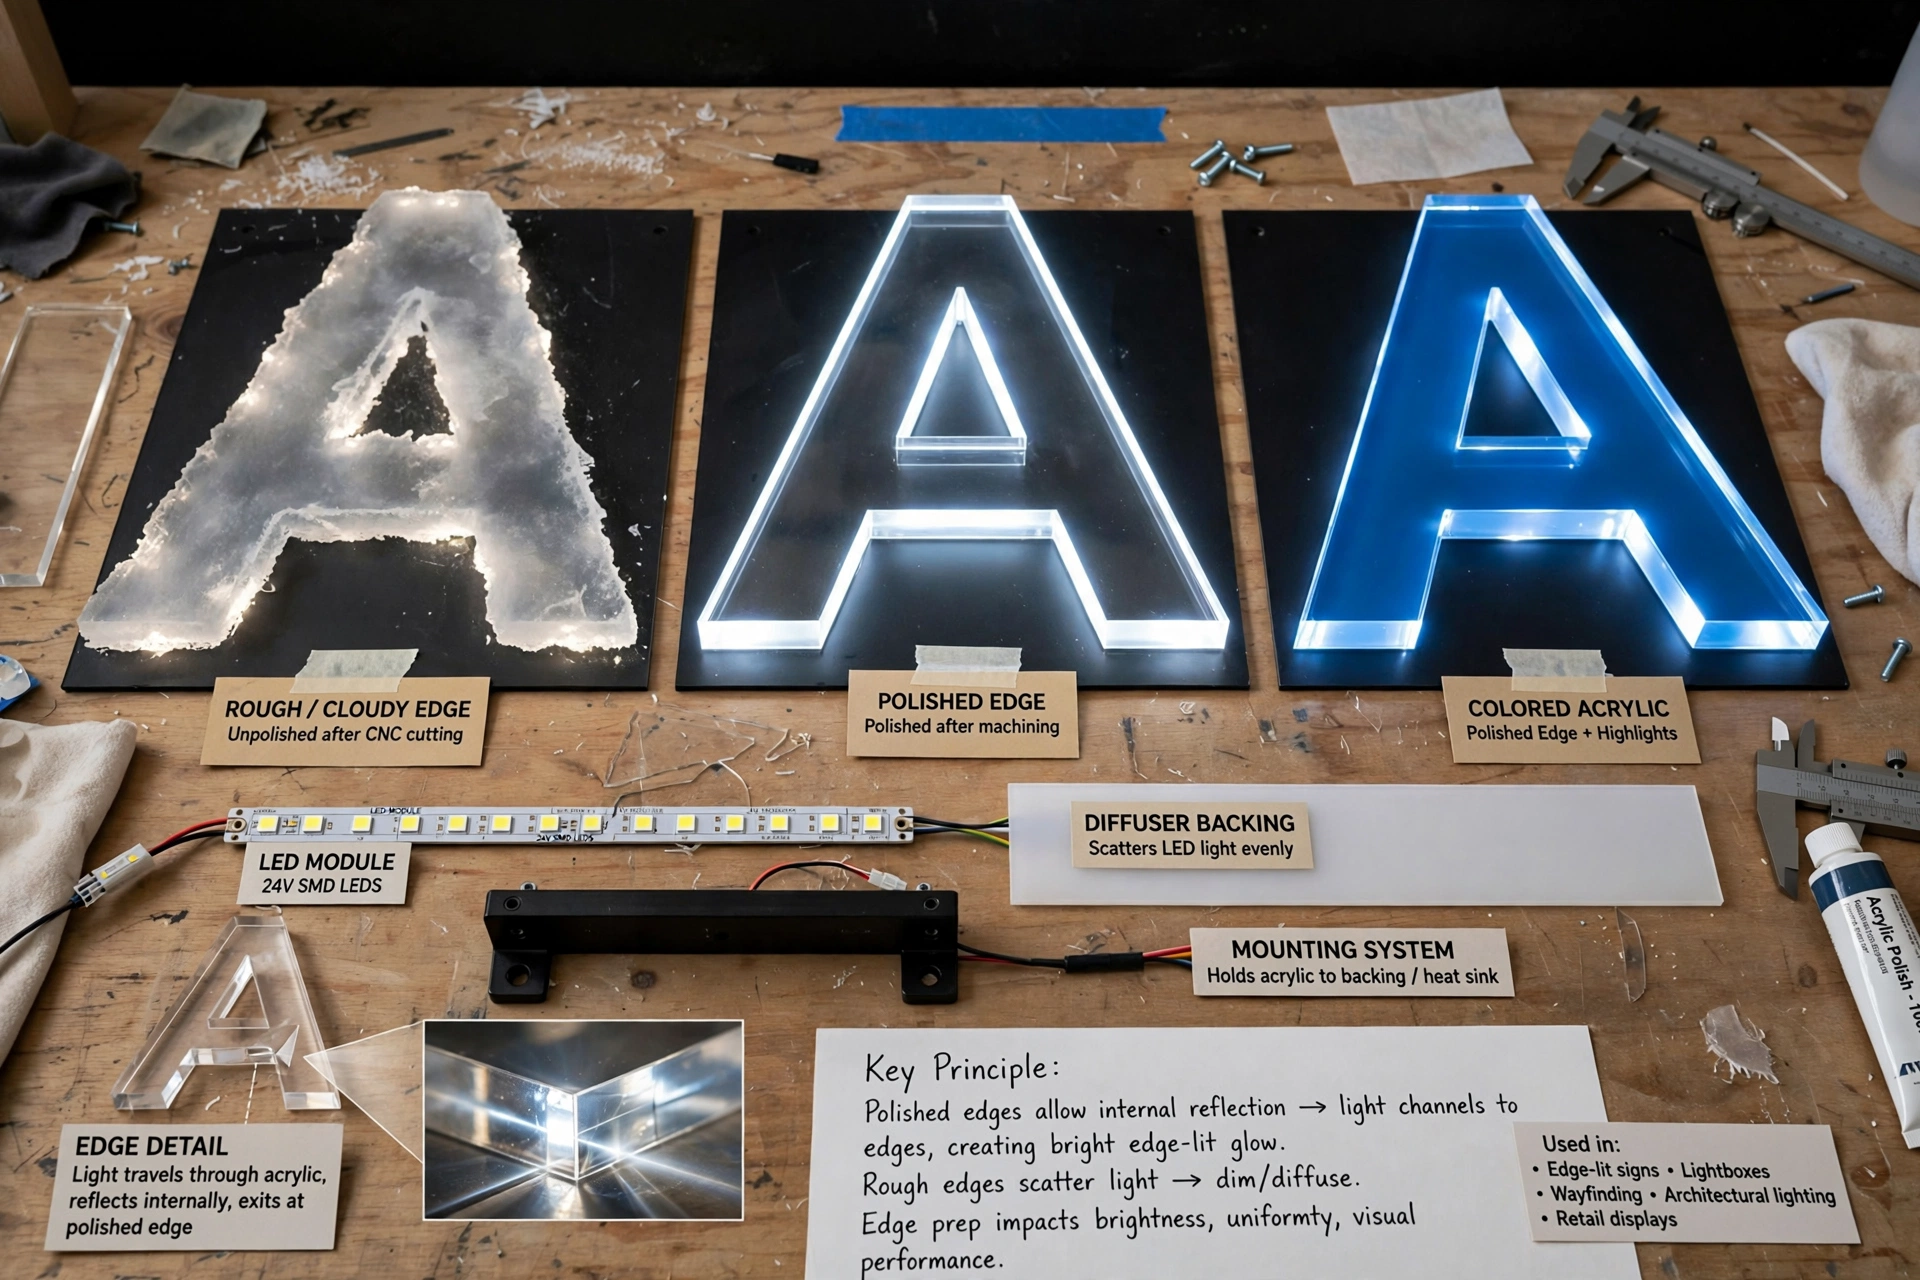
Polishing Acrylic for LED Lighting
Edge finishing becomes especially important when acrylic is used with LED lighting.
Light can travel through clear acrylic and become visible along polished edges.
This principle is used in:
- Edge-lit signs
- Lightboxes
- Display systems
- Decorative panels
- Retail displays
- Wayfinding signs
- Architectural lighting elements
A rough or cloudy edge can scatter light differently from a polished edge.
Therefore, edge preparation can influence the visual performance of an illuminated acrylic component.
Polishing Acrylic Letters and Signage
Acrylic is widely used for dimensional lettering and signage.
After cutting letters using CNC routing or laser cutting, the edges may be polished depending on the desired appearance.
Clear acrylic letters can benefit from highly transparent edges.
Coloured acrylic letters may use polished edges to create additional highlights.
For illuminated signage, the relationship between the acrylic edge, LED module, diffuser, backing, and mounting system should be considered during fabrication.
Avoiding Heat Damage
Heat is one of the most important considerations during acrylic finishing.
Acrylic can soften when exposed to excessive heat.
Heat can be generated through:
- High-speed sanding
- Excessive buffing pressure
- Incorrect routing
- Aggressive polishing
- Flame polishing
- Poor ventilation
The best approach is controlled material removal.
Allowing the acrylic to cool between operations can also help maintain dimensional stability.
Preventing Cracks and Stress
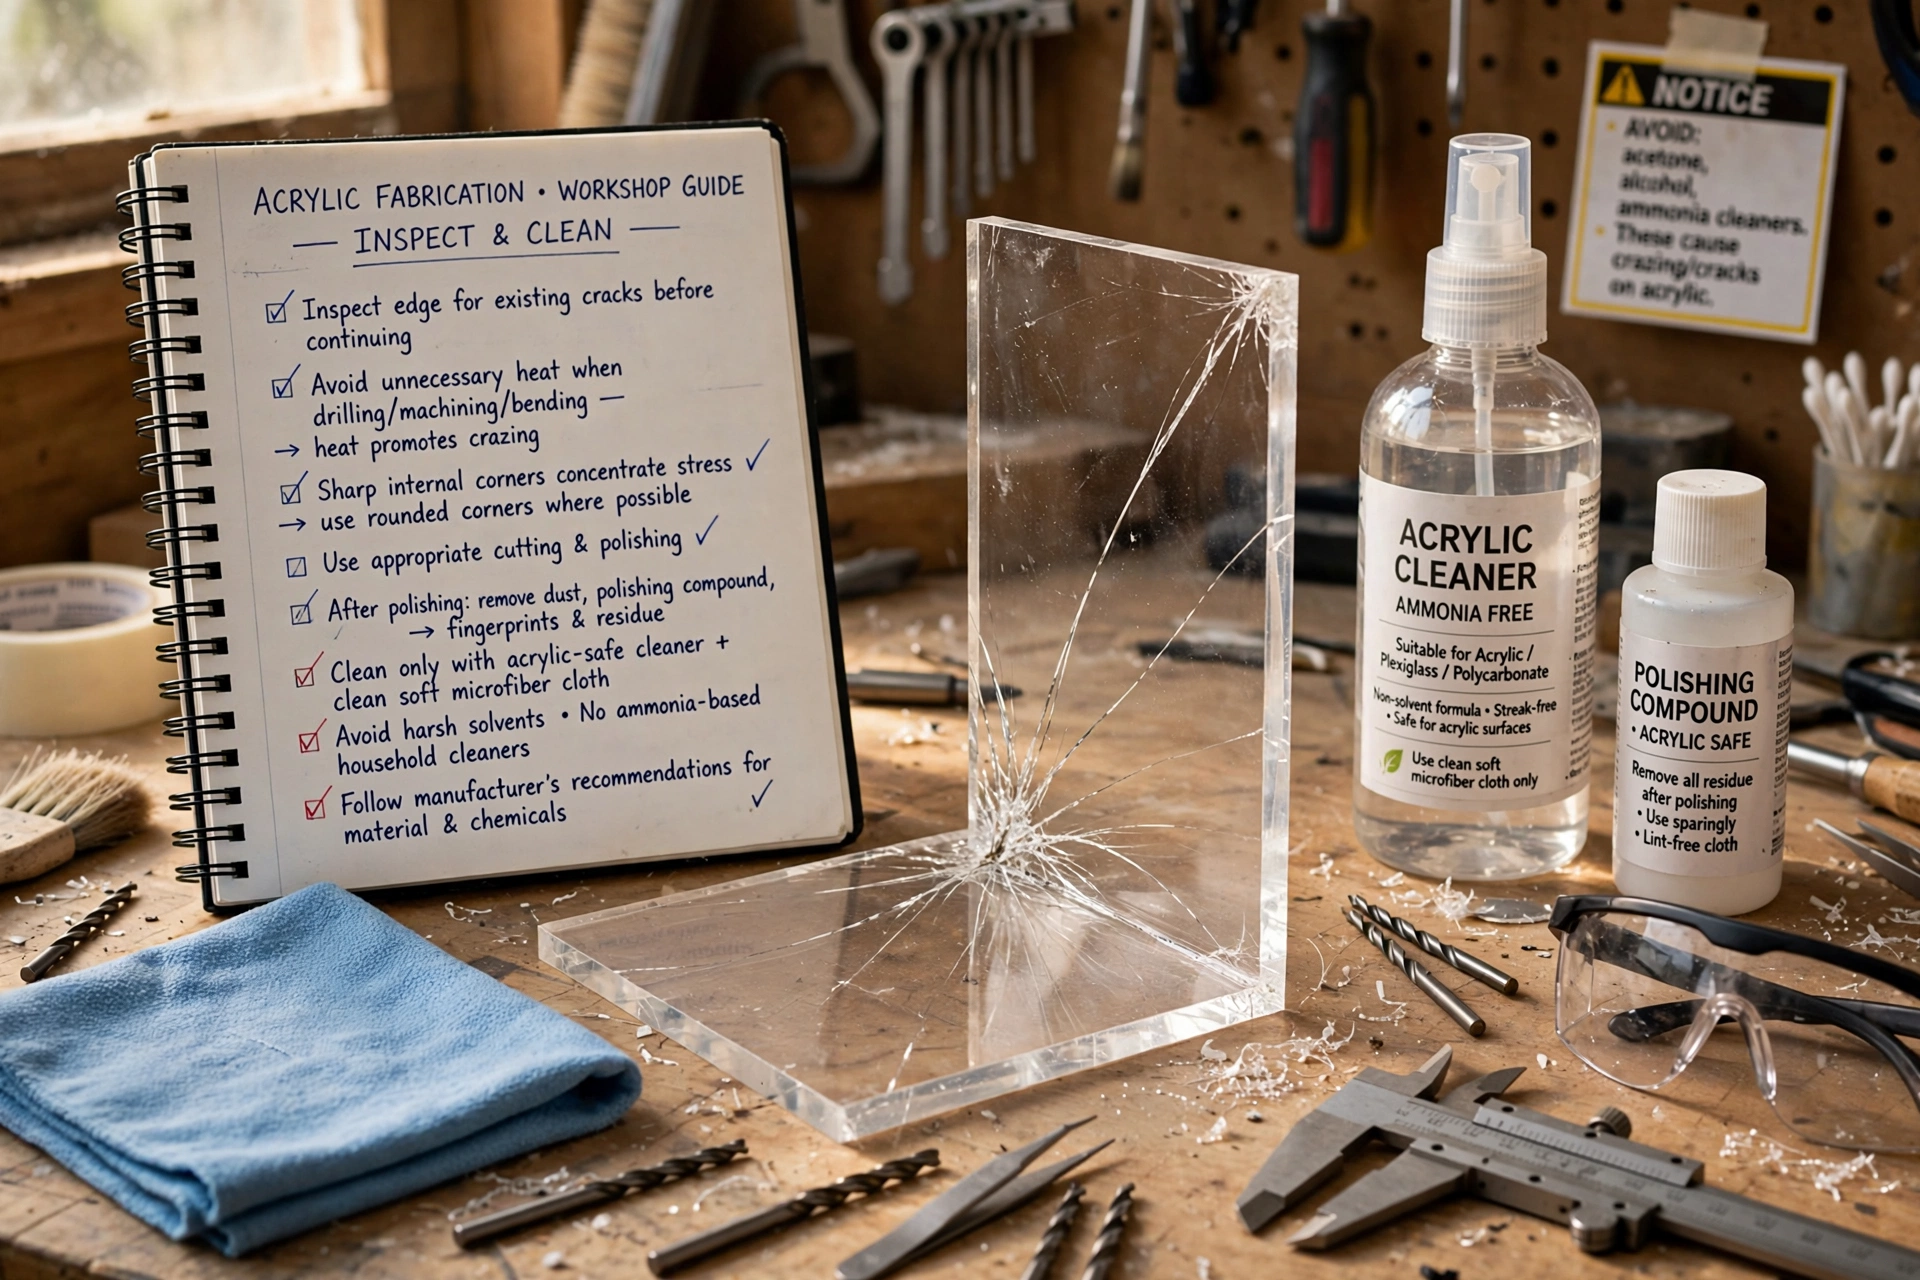
Acrylic can develop cracks when it is drilled, machined, bent, or exposed to unsuitable chemicals.
Sharp internal corners can also concentrate stress.
When polishing fabricated components, inspect the edge for existing cracks before continuing.
Avoid unnecessary heat.
Use appropriate cutting and polishing techniques.
For applications involving bending or chemical exposure, the material’s fabrication requirements should be considered before finishing.
Cleaning Acrylic After Polishing
After polishing, the acrylic should be cleaned carefully.
Dust, polishing compound, fingerprints, and residue can remain on the surface.
Use a clean, soft microfiber cloth and a cleaner suitable for acrylic.
Avoid harsh solvents that can damage or craze the material.
Ammonia-based household cleaners and certain aggressive chemicals may be unsuitable for acrylic surfaces.
Always follow the recommendations of the acrylic manufacturer.
Common Mistakes When Polishing Acrylic
Several mistakes can reduce the quality of an acrylic finish.
One common mistake is starting with an abrasive that is too fine to remove the existing machining marks.
Another is applying too much pressure during sanding.
Excessive pressure generates heat and can create uneven edges.
Using contaminated polishing materials can introduce new scratches.
Another problem is attempting to flame-polish an edge that has not been adequately prepared.
The flame can make an imperfect surface glossy without actually correcting the underlying geometry.
Good preparation remains the foundation of professional polishing.
How to Get a Glass-Like Acrylic Edge
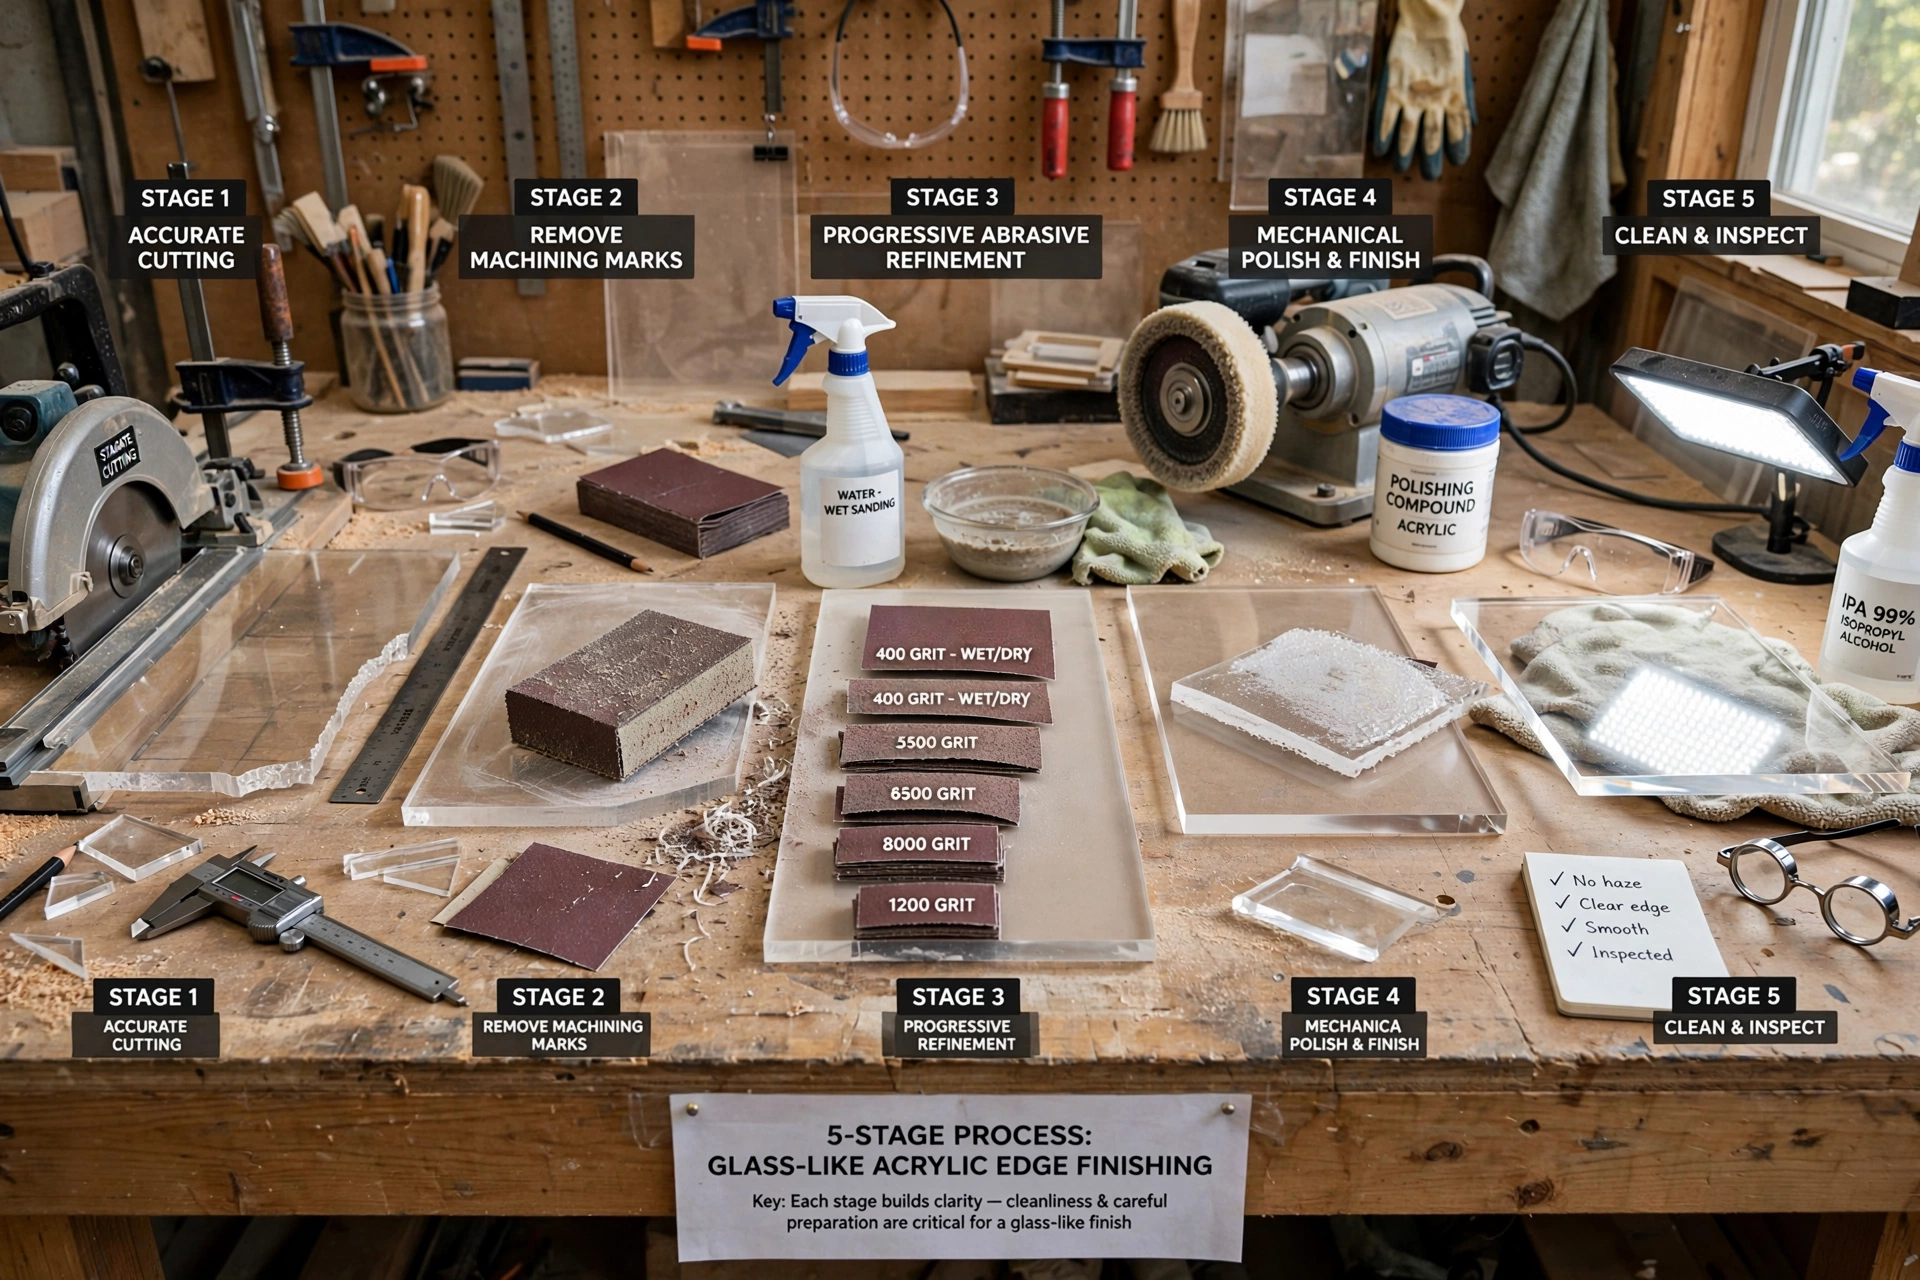
A glass-like acrylic edge generally requires several controlled stages.
First, the edge should be accurately cut.
Second, visible machining marks should be removed.
Third, progressively finer abrasives should refine the surface.
Fourth, the edge can be mechanically polished or treated using another appropriate finishing method.
Finally, the surface should be cleaned and inspected under suitable lighting.
The clearer the acrylic, the more important this preparation becomes.
Acrylic Sheet Edge Finishing for Commercial Applications
Businesses using acrylic for retail displays, exhibition systems, signage, partitions, POS displays, and architectural features often require consistent finishing across multiple components.
In these situations, fabrication quality becomes especially important.
A professional fabricator should maintain consistent dimensions, edge profiles, surface finishes, and polishing quality throughout the production batch.
This is particularly relevant when several acrylic panels are installed next to one another.
Inconsistent edge finishes can become noticeable when viewed together.
Choosing an Acrylic Sheet Supplier
The quality of the raw material can influence fabrication results.
A reliable Acrylic Sheet Edges Supplier can help businesses source acrylic sheets suitable for their intended application, whether the requirement involves clear acrylic, coloured sheets, frosted acrylic, mirrored acrylic, fluorescent materials, or other specialty options.
When selecting acrylic, consider sheet thickness, colour, transparency, surface finish, application, fabrication requirements, and available sizes.
Good material selection makes the subsequent cutting and finishing process easier.
Acrylic Applications in Dubai
Acrylic is widely suited to commercial and architectural applications across Dubai.
It can be used for:
- Retail displays
- Shop signage
- Reception signs
- Exhibition stands
- Restaurant displays
- Hotel interiors
- Office partitions
- Menu boards
- Lightboxes
- Point-of-sale displays
- Decorative panels
- Furniture components
- Architectural features
Dubai’s retail, hospitality, exhibition, construction, and interior design sectors create many applications where clean acrylic fabrication can contribute to a professional appearance.
Acrylic Fabrication for Retail and Hospitality
Retail stores and hospitality environments often require attractive materials that can be shaped into customized forms.
Acrylic can be fabricated into shelves, illuminated displays, product stands, signage, partitions, counters, and decorative elements.
Because these components are often highly visible, edge quality matters.
A polished edge can make a fabricated acrylic component appear more refined and intentional.
In luxury retail environments, small details can have a significant influence on how customers perceive the overall space.
Maintaining Polished Acrylic Edges
Once an acrylic edge has been polished, proper maintenance helps preserve its appearance.
Avoid abrasive cleaning materials.
Use soft microfiber cloths.
Keep dust and grit away from polished surfaces.
Do not place sharp objects directly against visible acrylic edges.
Where acrylic is used in a high-traffic commercial environment, inspect the edges periodically for scratches or impact damage.
If the edge becomes scratched, it may be possible to refinish it depending on the depth and location of the damage.
Frequently Asked Questions
Can all acrylic sheet edges be polished?
Most acrylic edges can be improved through suitable finishing techniques. The appropriate method depends on the acrylic type, thickness, cut quality, and required appearance.
What is the best way to polish clear acrylic edges?
A smooth cut followed by progressive sanding and mechanical polishing can produce a highly transparent edge. Flame or diamond polishing may also be appropriate for certain applications.
Can laser-cut acrylic edges be polished?
Laser-cut acrylic can already have a smooth appearance, but additional polishing may be used when an especially refined finish is required.
Why does acrylic become cloudy when sanding?
Sanding creates microscopic scratches that scatter light. Progressively finer abrasives and polishing reduce these scratches and restore transparency.
Can acrylic be polished with a buffing wheel?
Yes. A suitable buffing wheel and plastic polishing compound can produce a glossy finish, provided heat buildup is controlled.
Is flame polishing safe for acrylic?
Flame polishing requires appropriate equipment, ventilation, fire precautions, and experience. Excessive heat can damage acrylic, so it should not be treated as a casual DIY process.
How can I prevent scratches while polishing acrylic?
Keep the work area clean, use uncontaminated abrasives, protect the acrylic faces, and avoid dragging tools or debris across the material.
Conclusion
Polishing acrylic sheet edges is an important part of producing a professional-looking fabricated component. The process can range from simple sanding for a clean functional finish to advanced buffing, flame polishing, or diamond polishing for highly transparent and glossy edges.
The best results begin with accurate cutting and careful preparation. Rough machining marks should be removed progressively, fine abrasives should be used to refine the surface, and the final polishing method should be selected according to the acrylic type and application.
For signage, retail displays, furniture, exhibition systems, architectural panels, lightboxes, and illuminated products, a well-finished acrylic edge can significantly improve the overall appearance.
The key is to control abrasion, pressure, heat, cleanliness, and polishing technique throughout the process.
With suitable acrylic material, accurate fabrication, proper edge preparation, and an appropriate finishing method, acrylic sheets can achieve clean, smooth, and highly refined edges that are suitable for demanding commercial and architectural applications.