

Blogs
How to Calculate the Number of Acrylic Sheets Needed for a Project

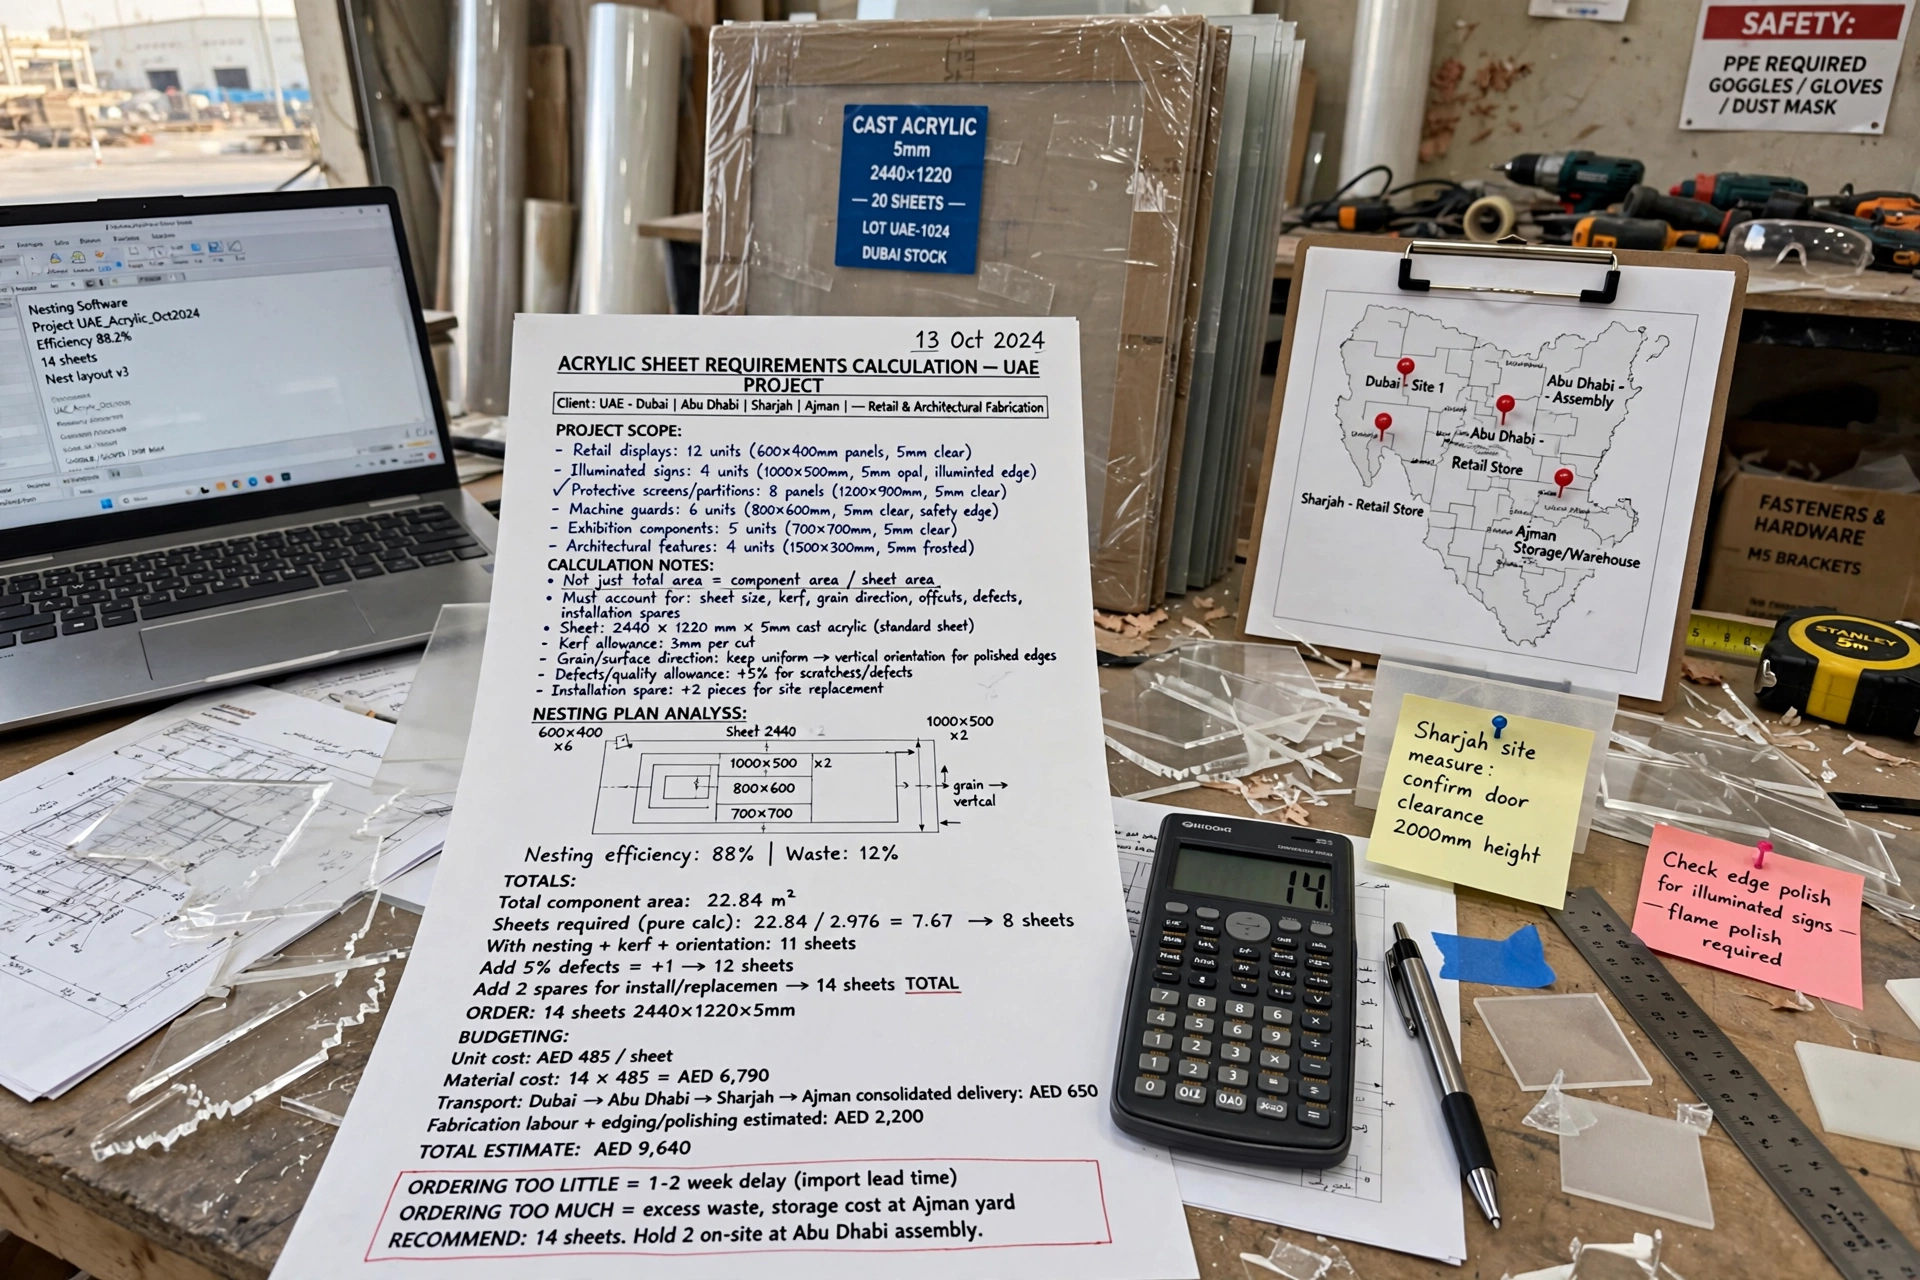
Calculating the number of acrylic sheets required for a project is an important part of planning fabrication, budgeting, transportation, and installation. Whether the project involves retail displays, illuminated signs, protective screens, partitions, exhibition components, machine guards, architectural features, or custom acrylic products, buying the correct quantity of material can reduce waste and prevent delays.
The calculation may appear simple: determine the total area required and divide it by the area of one sheet. However, professional acrylic fabrication requires more than a basic area calculation. Sheet dimensions, cutting patterns, material thickness, kerf, grain or surface direction where relevant, edge finishing, component orientation, offcuts, defects, installation requirements, and replacement pieces can all influence the final quantity.
For projects in Dubai, Abu Dhabi, Sharjah, Ajman, and other parts of the UAE, transportation, fabrication facilities, installation access, and the availability of standard sheet dimensions may also affect the most practical purchasing decision.
Why Accurate Acrylic Sheet Calculation Matters
The quantity of acrylic required affects the overall material cost of a project. Ordering too little can delay production, while ordering substantially more than necessary can increase material waste and storage requirements.
Acrylic sheets are available in different dimensions and thicknesses, and the most efficient sheet depends on the actual component sizes required by the project.
For example, a project requiring ten panels measuring 500 × 500 mm may be planned very differently from a project requiring four panels measuring 1,000 × 2,000 mm. Even if the total required area appears similar, the cutting layout can produce very different amounts of waste.
The objective is therefore not simply to calculate total square metres. The objective is to determine how many complete sheets can efficiently produce the required components.
Start With the Finished Component Dimensions
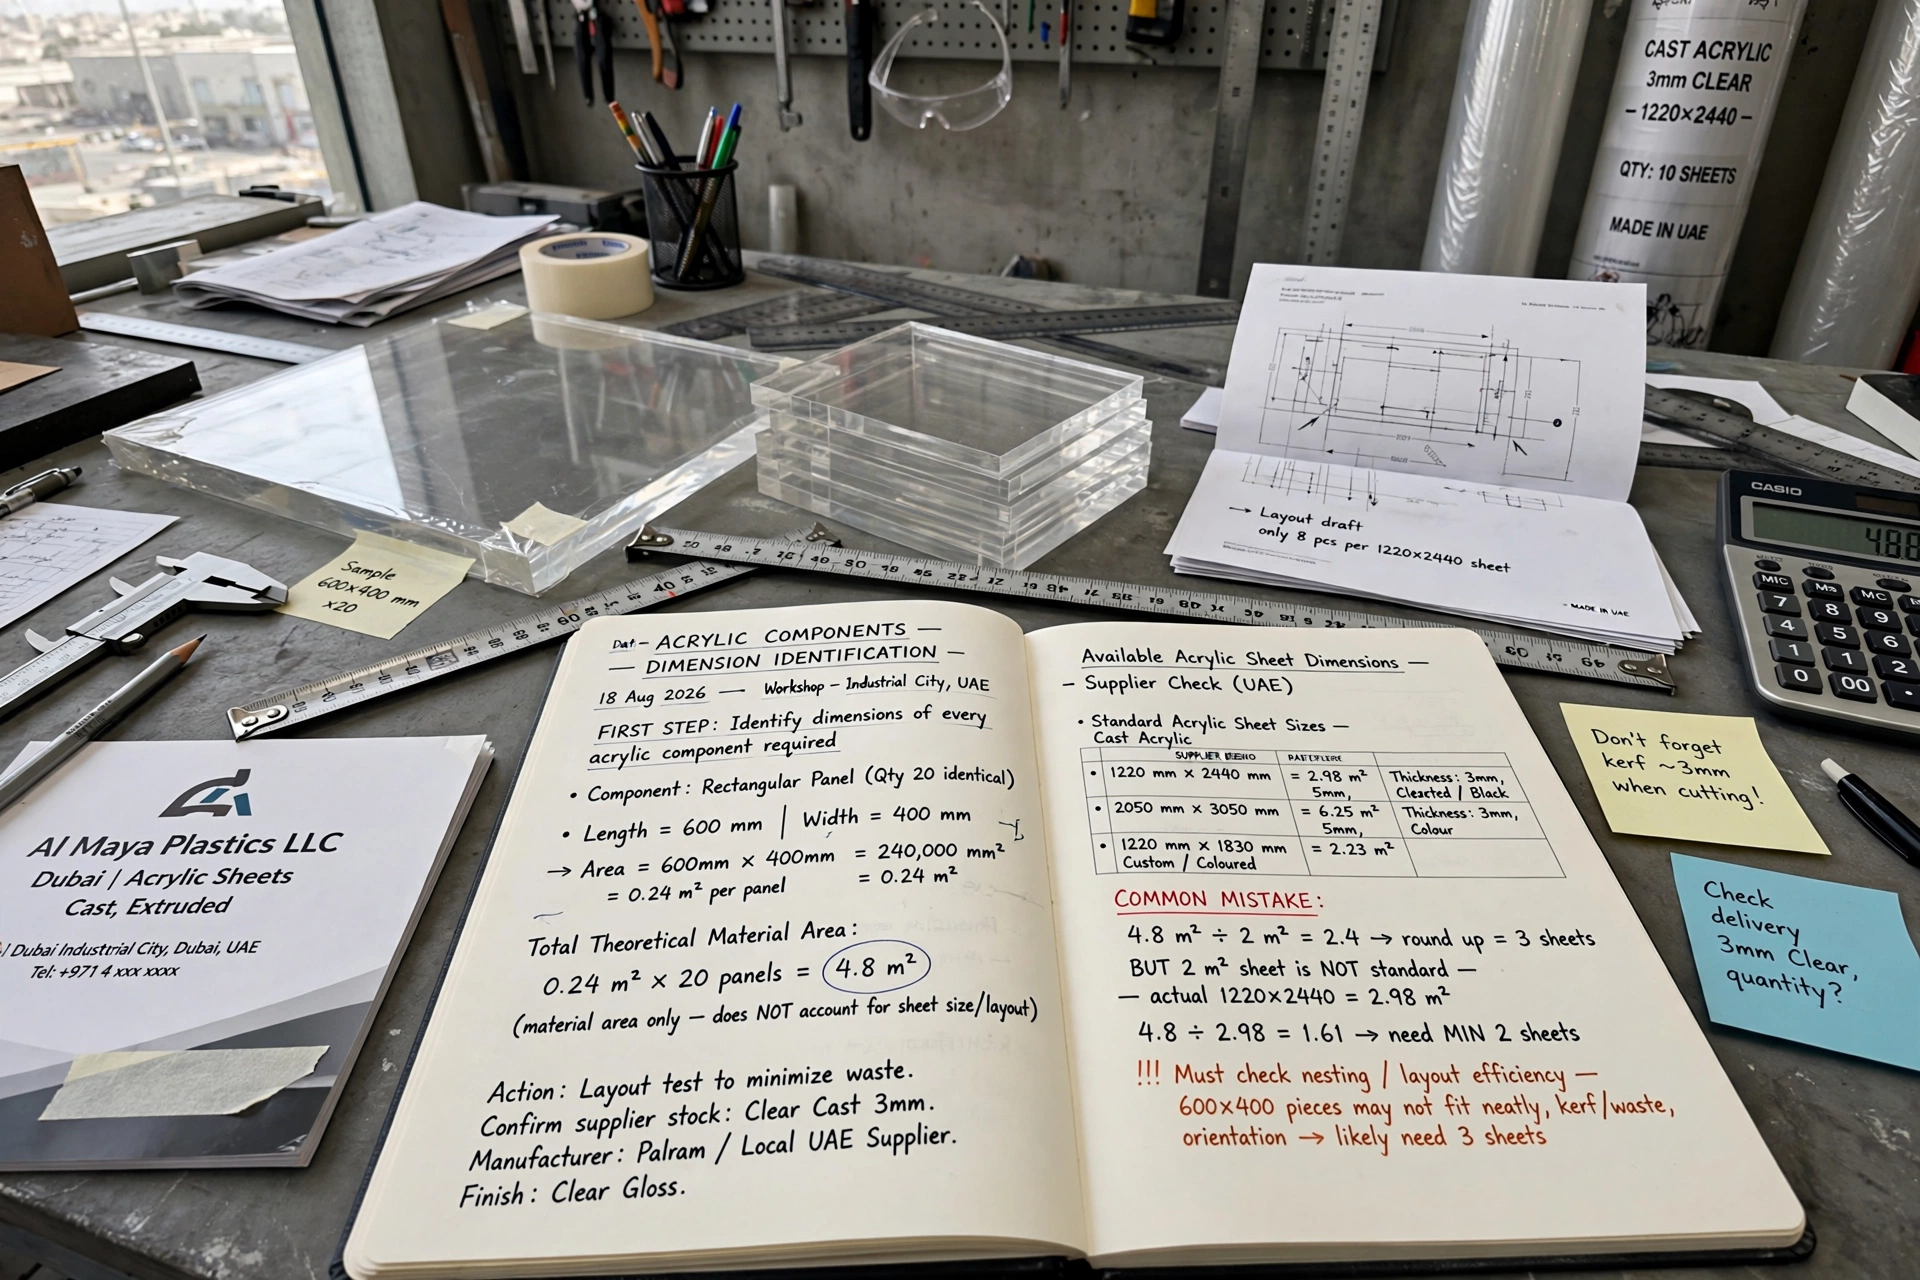
The first step is to identify the dimensions of every acrylic component required.
Record the length and width of each individual piece.
For rectangular components, the basic area is:
Area = Length × Width
For example, if one acrylic panel measures 600 mm × 400 mm:
600 × 400 = 240,000 mm²
Converting to square metres:
240,000 ÷ 1,000,000 = 0.24 m²
If the project requires 20 identical panels:
0.24 × 20 = 4.8 m²
This gives the theoretical material area, but it does not yet determine how many physical sheets are required.
Identify the Available Acrylic Sheet Dimensions
After determining the component dimensions, check the available sheet sizes.
Acrylic suppliers may offer different standard or custom dimensions depending on the material, thickness, colour, finish, manufacturer, and application.
A common mistake is to calculate the required area without considering the physical dimensions of the sheet.
For example, if you need 4.8 m² of material and each available sheet provides 2 m², dividing 4.8 by 2 gives 2.4 sheets. Since you cannot purchase 0.4 of a standard sheet for a typical fabrication requirement, you would need at least three sheets.
However, even three sheets may not be enough if the component dimensions cannot be arranged efficiently on those sheets.
Calculate the Area of One Acrylic Sheet
The next step is to calculate the area of the selected sheet.
For a sheet measuring 2,440 × 1,220 mm:
2,440 × 1,220 = 2,976,800 mm²
This is approximately:
2.977 m²
If the required component area is 4.8 m², the theoretical calculation would be:
4.8 ÷ 2.977 ≈ 1.61 sheets
This suggests two sheets based purely on area.
But the actual cutting layout still needs to be checked.
Why Area Alone Is Not Enough
Imagine a sheet measuring 2,440 × 1,220 mm.
Suppose your project requires pieces measuring 1,500 × 1,000 mm.
The area calculation may suggest that two pieces could fit within one large sheet because their combined area is 3,000,000 mm², which is slightly larger than the sheet’s 2,976,800 mm².
That already shows the importance of checking the physical dimensions.
Even when the total component area is smaller than the sheet area, the pieces may not fit because of their length and width.
This is why professional fabrication uses a cutting layout or nesting plan rather than relying only on square-metre calculations.
Consider the Cutting Layout
A cutting layout determines how individual acrylic components are positioned on the sheet.
The objective is to maximize usable material while leaving sufficient space for cutting.
For rectangular pieces, the fabricator can consider different orientations.
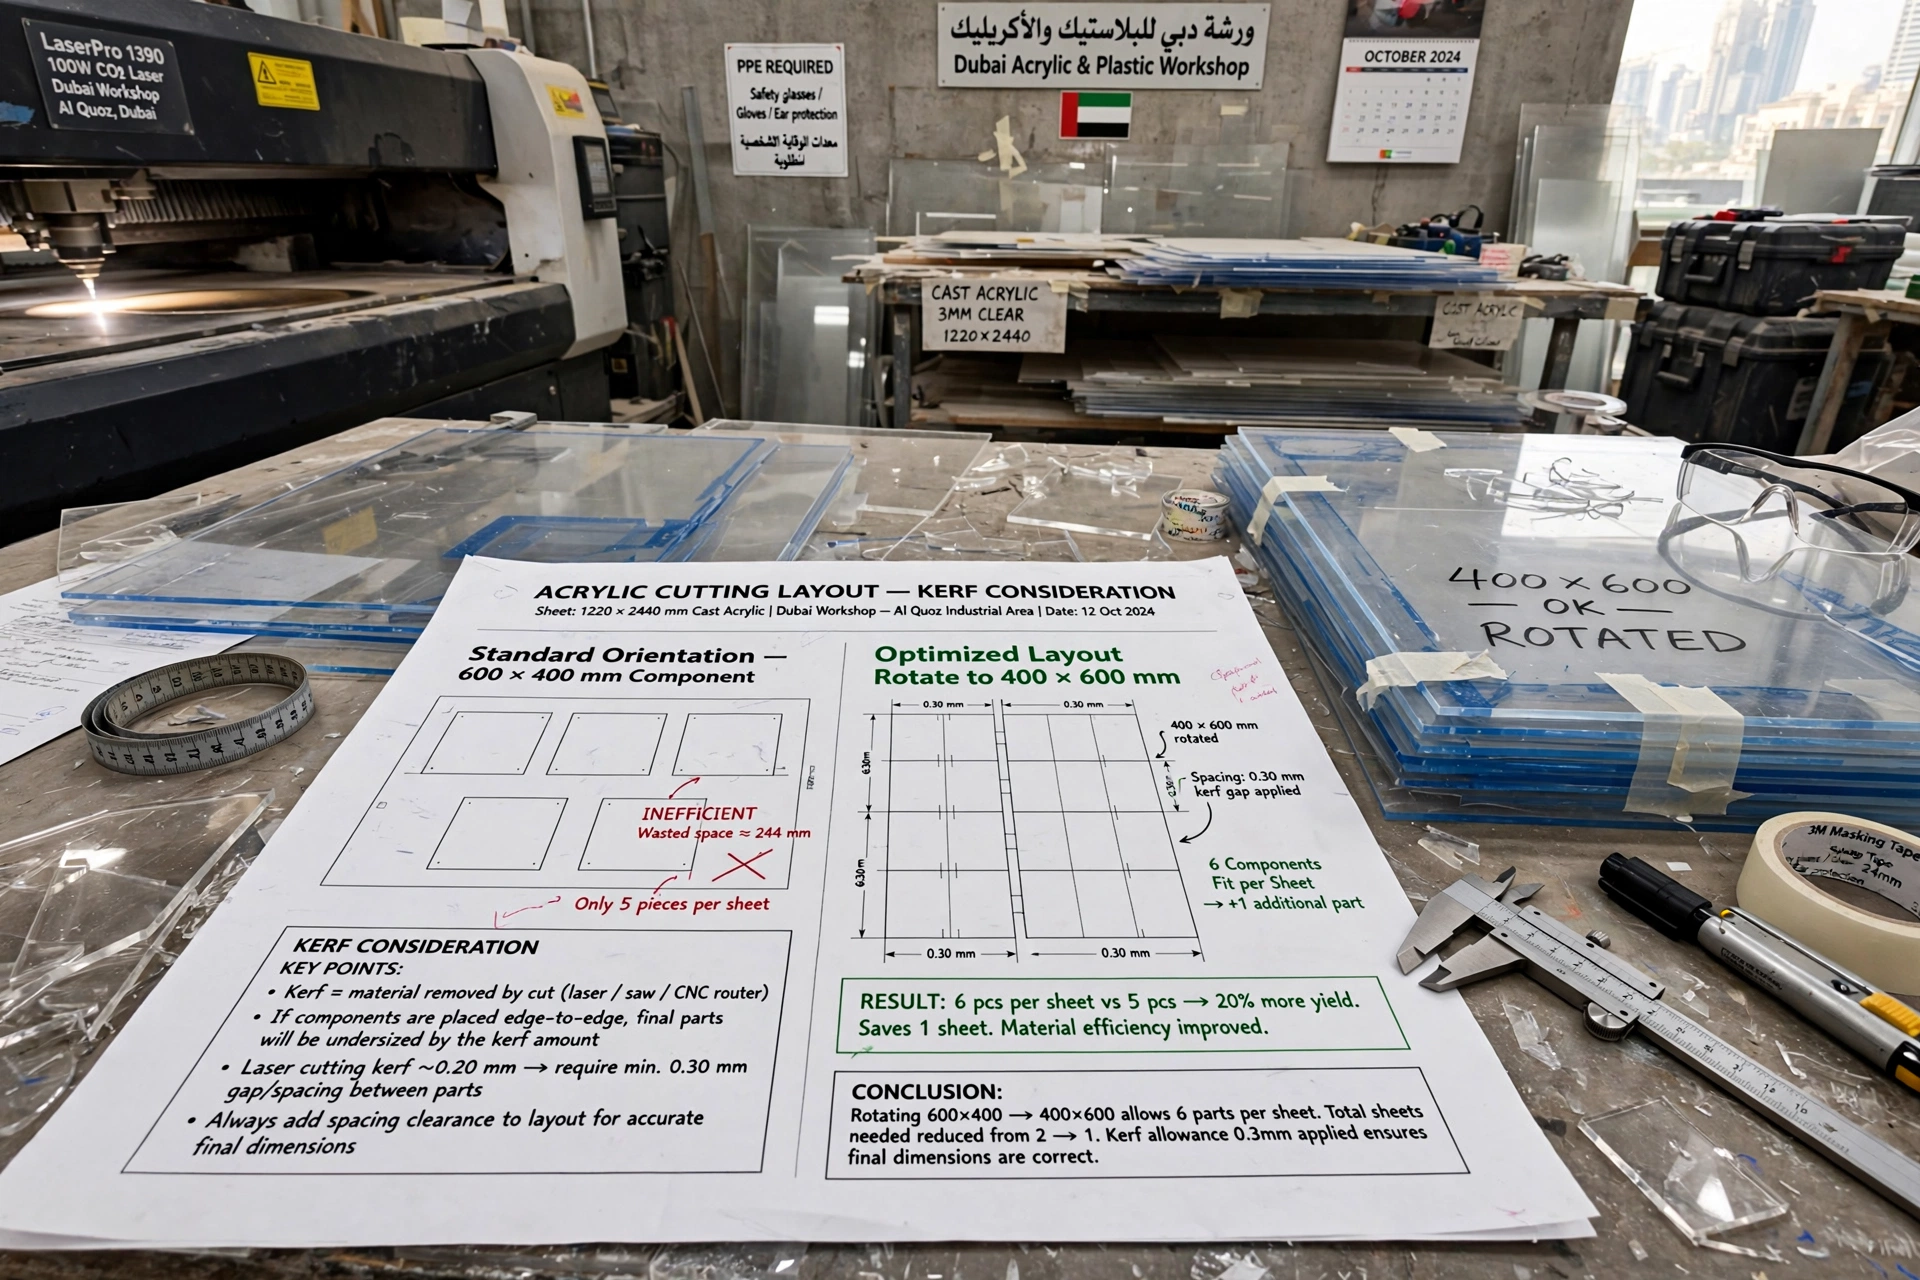
For example, a 600 × 400 mm component can sometimes be rotated to 400 × 600 mm if the application allows it.
Changing the orientation can allow additional components to fit onto the same sheet.
A good cutting layout can therefore reduce the number of sheets required.
Account for Cutting Kerf
Every cutting method removes some material.
Laser cutting, saw cutting, CNC routing, and other fabrication methods have different cutting characteristics.
The material removed by the cutting tool is known as the kerf.
If multiple components are positioned directly against one another without allowing appropriate cutting clearance, the final dimensions may not be correct.
The cutting layout should therefore include suitable spacing based on the fabrication method and equipment.
The exact allowance should be determined by the fabricator rather than using one universal value for every cutting process.
Acrylic Thickness Does Not Usually Change Area
Acrylic thickness is extremely important for the final application, but it generally does not change the two-dimensional sheet-area calculation.
For example, a 3 mm acrylic sheet and a 10 mm acrylic sheet could theoretically have the same length and width.
However, thickness affects:
- Weight
- Cost
- Cutting method
- Bending requirements
- Structural strength
- Transportation
- Handling
- Installation
- Edge finishing
Therefore, the required sheet thickness should be selected separately from the quantity calculation.
Calculate Sheets for Identical Rectangular Pieces
If all project components have identical dimensions, the calculation can be relatively straightforward.
Suppose a project requires 30 pieces measuring:
500 mm × 300 mm
Each piece requires:
500 × 300 = 150,000 mm²
For 30 pieces:
150,000 × 30 = 4,500,000 mm²
This equals:
4.5 m²
If the selected sheet provides approximately 2.977 m², the theoretical area calculation becomes:
4.5 ÷ 2.977 ≈ 1.51
Therefore, at least two sheets would be required by area.
The next step is to verify whether all 30 pieces can actually be nested efficiently across two sheets.
Calculate Sheets for Different Component Sizes
Projects often contain different acrylic components rather than identical pieces.
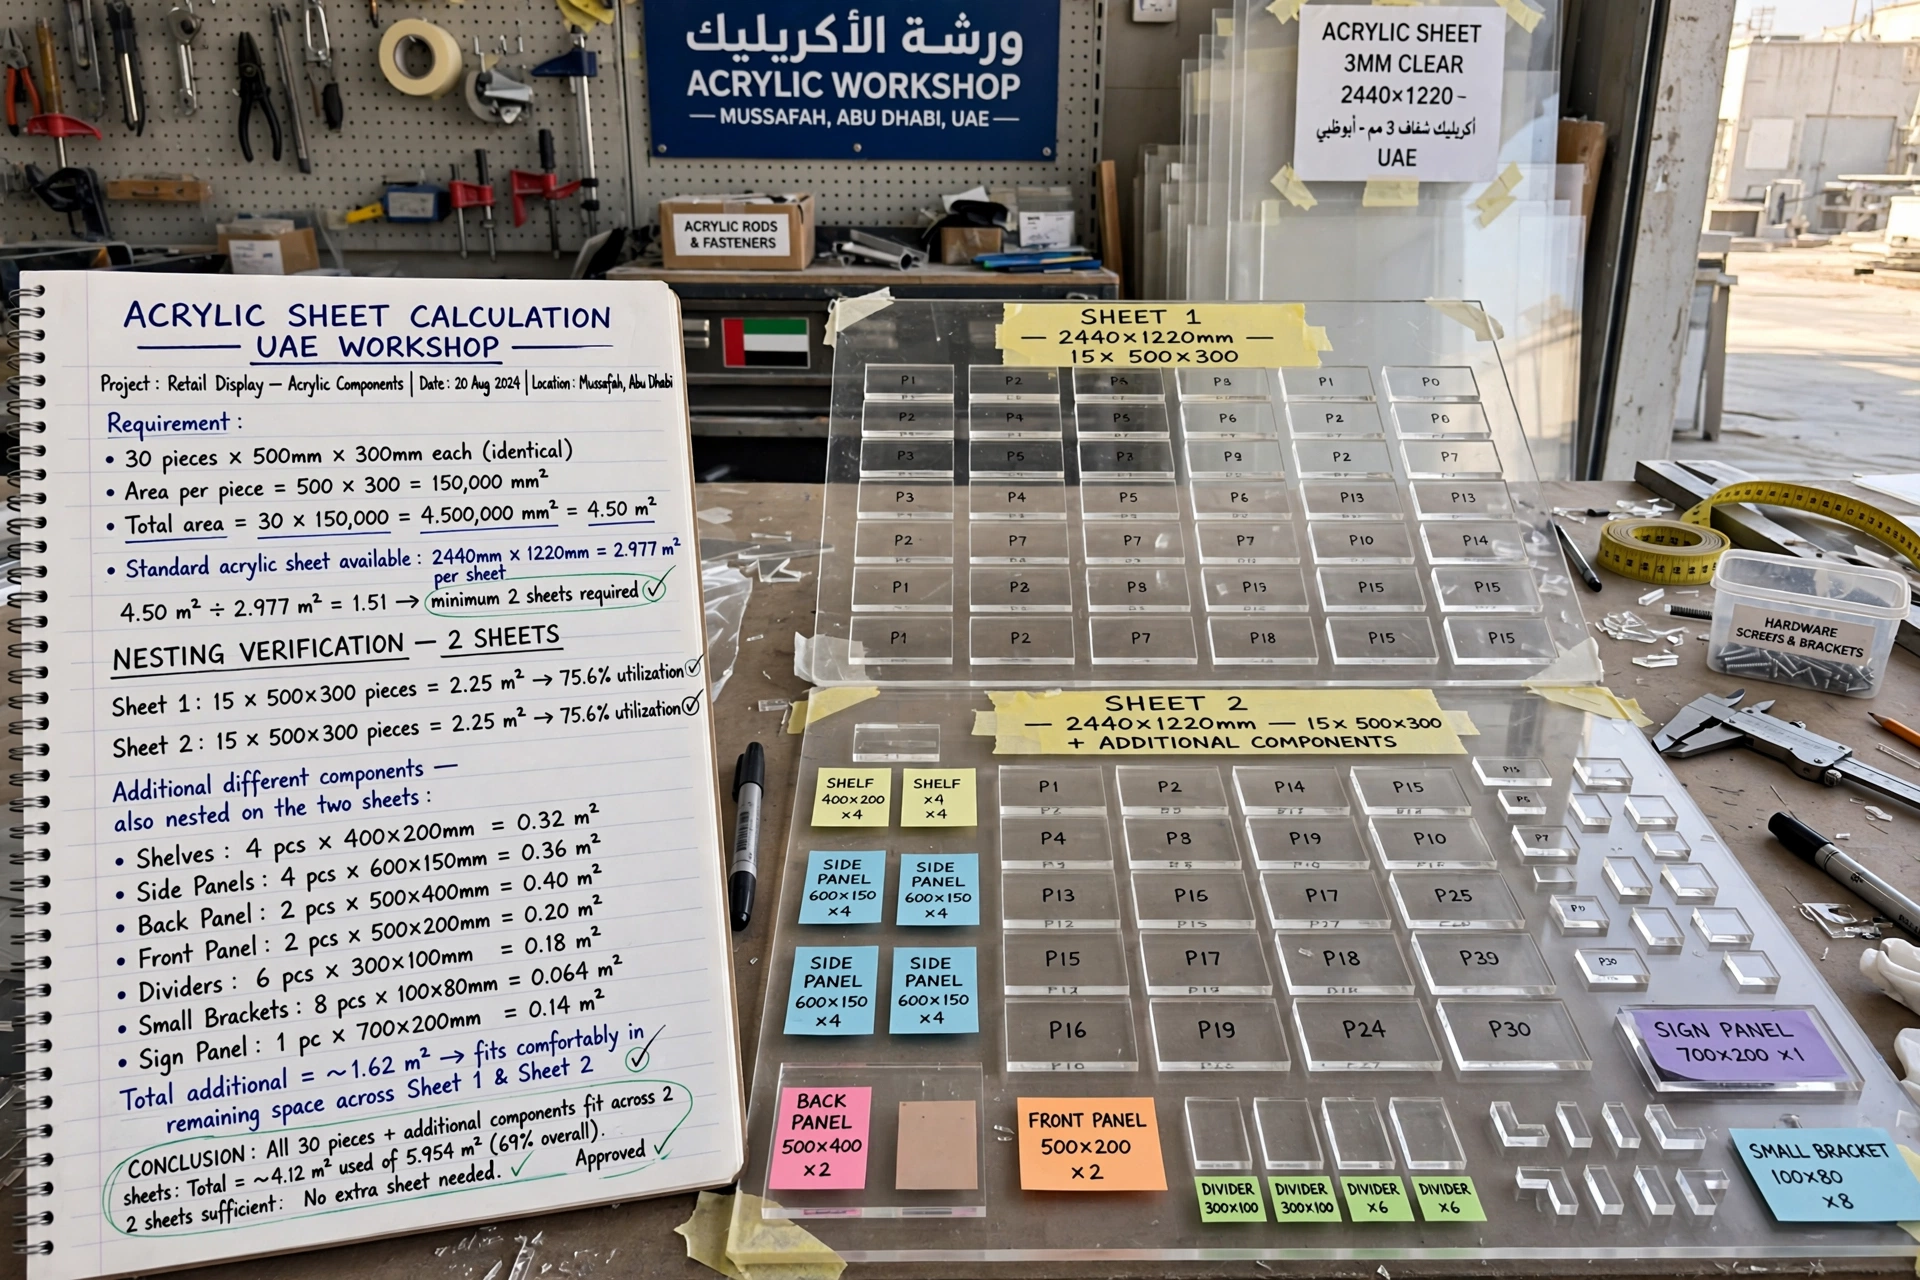
A retail display, for example, could require:
- Shelves
- Side panels
- Back panels
- Front panels
- Dividers
- Small brackets
- Sign panels
Each component may have a different dimension.
In this situation, create a cutting list containing the length, width, quantity, and thickness of each component.
The cutting list can then be arranged into sheet layouts.
This approach provides a much more accurate estimate than simply adding all areas together.
Consider Offcuts
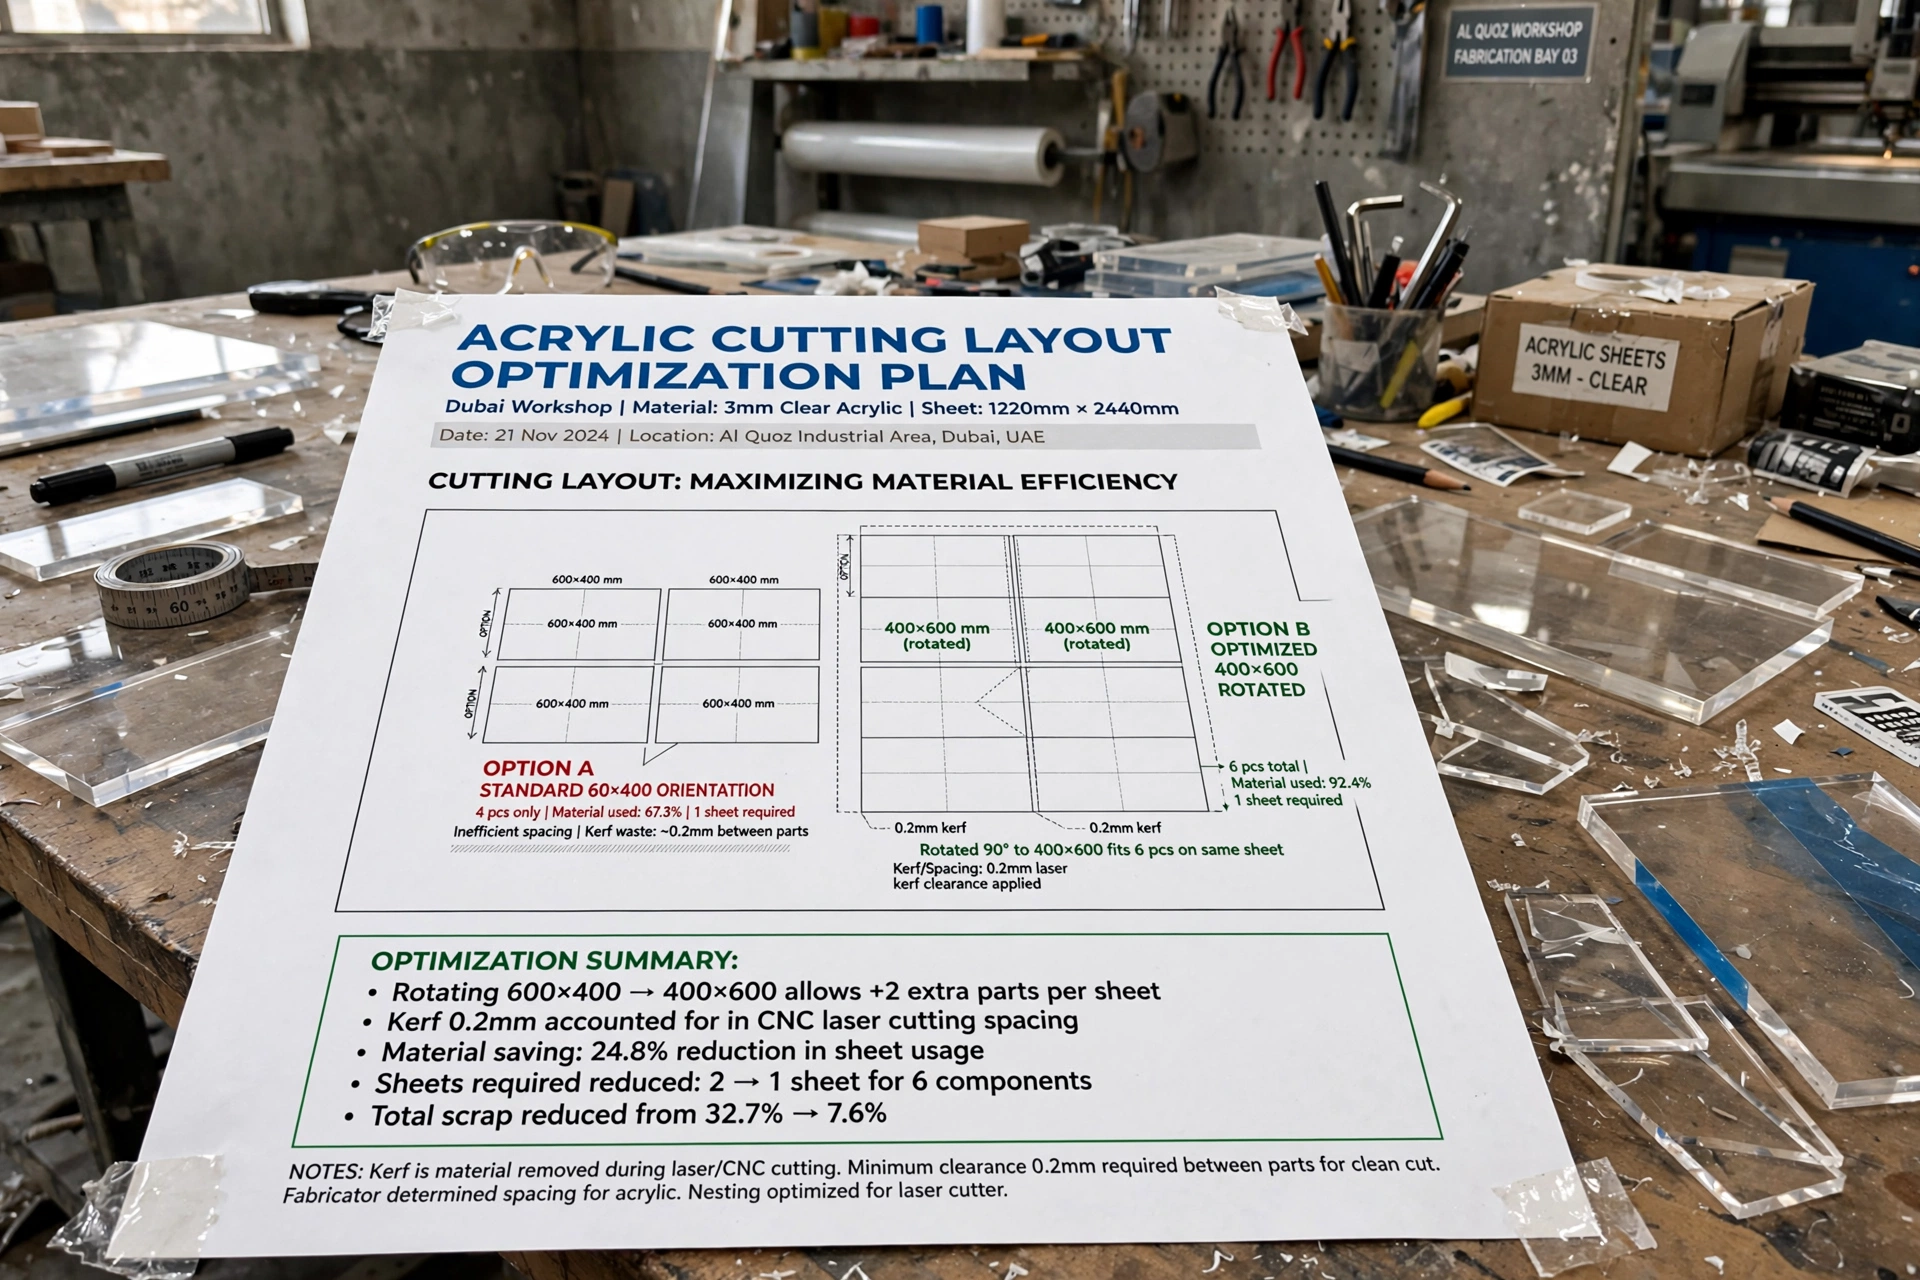
Acrylic fabrication naturally produces offcuts.
An offcut is the remaining material after required components have been cut from a sheet.
Some offcuts may be large enough to use for future components.
Others may be too small or irregular to be useful.
When calculating project requirements, usable offcuts should be considered where practical.
For example, if a project requires several small pieces, a large leftover section from another sheet might be suitable instead of opening a new full sheet.
This can reduce material consumption.
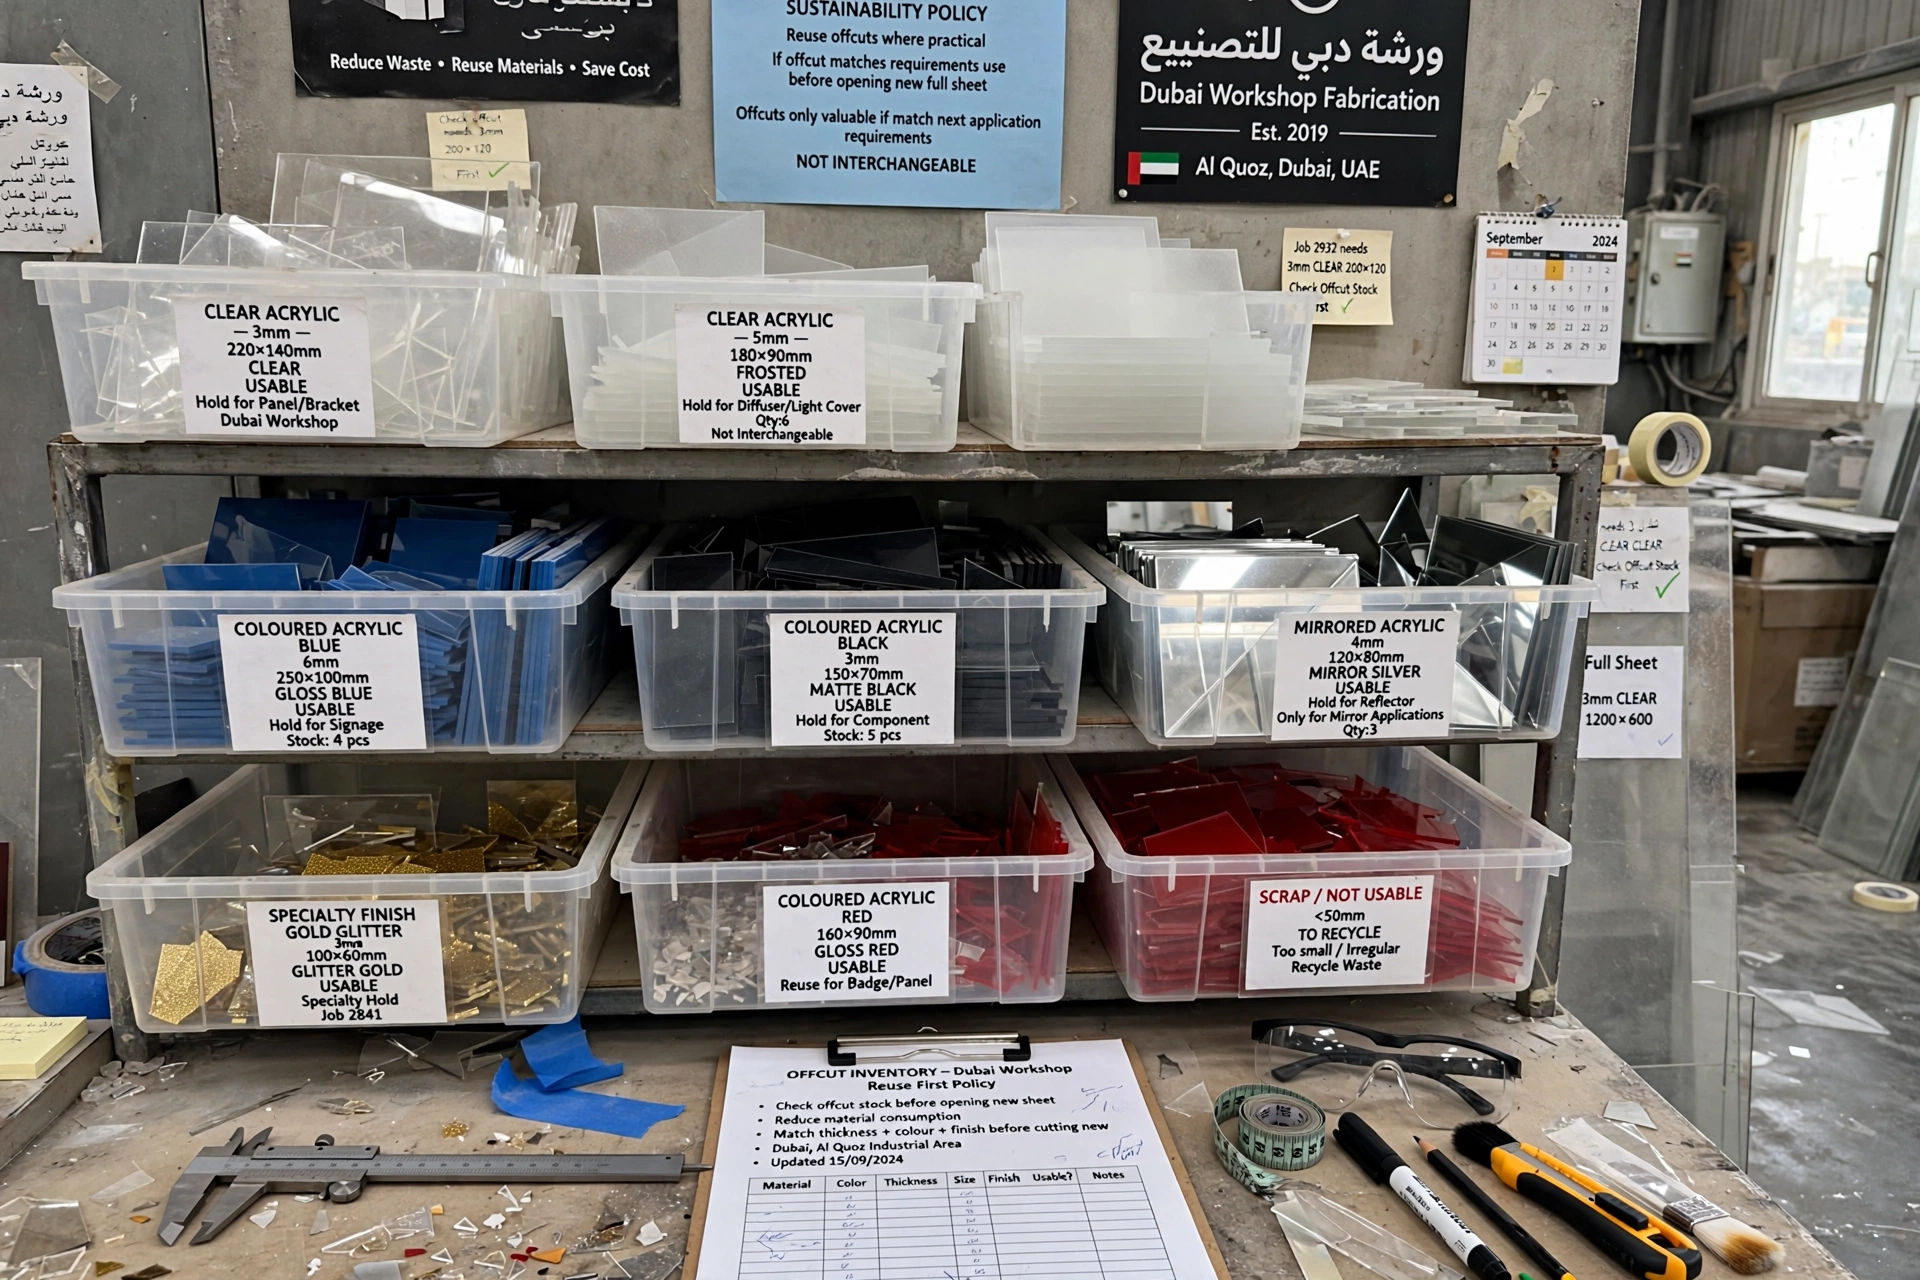
Keep Useful Offcuts Organized
For fabrication businesses, maintaining an organized offcut inventory can improve material utilization.
Offcuts should ideally be identified by:
- Material type
- Colour
- Thickness
- Dimensions
- Finish
- Transparency
Clear acrylic, frosted acrylic, coloured acrylic, mirrored acrylic, and specialty finishes should not automatically be treated as interchangeable.
An offcut only has value if it matches the requirements of the next application.
Add a Practical Waste Allowance
Even with careful nesting, some material waste may remain.
A project may require additional material because of:
- Cutting losses
- Irregular shapes
- Small unusable offcuts
- Fabrication mistakes
- Surface damage
- Installation adjustments
- Replacement components
The appropriate allowance depends on the complexity of the project.
Simple rectangular components can often be planned more efficiently than complex shapes.
For a high-value or difficult fabrication project, discussing the expected waste factor with the acrylic fabricator is preferable to applying an arbitrary percentage.
Irregular Acrylic Shapes Require More Planning
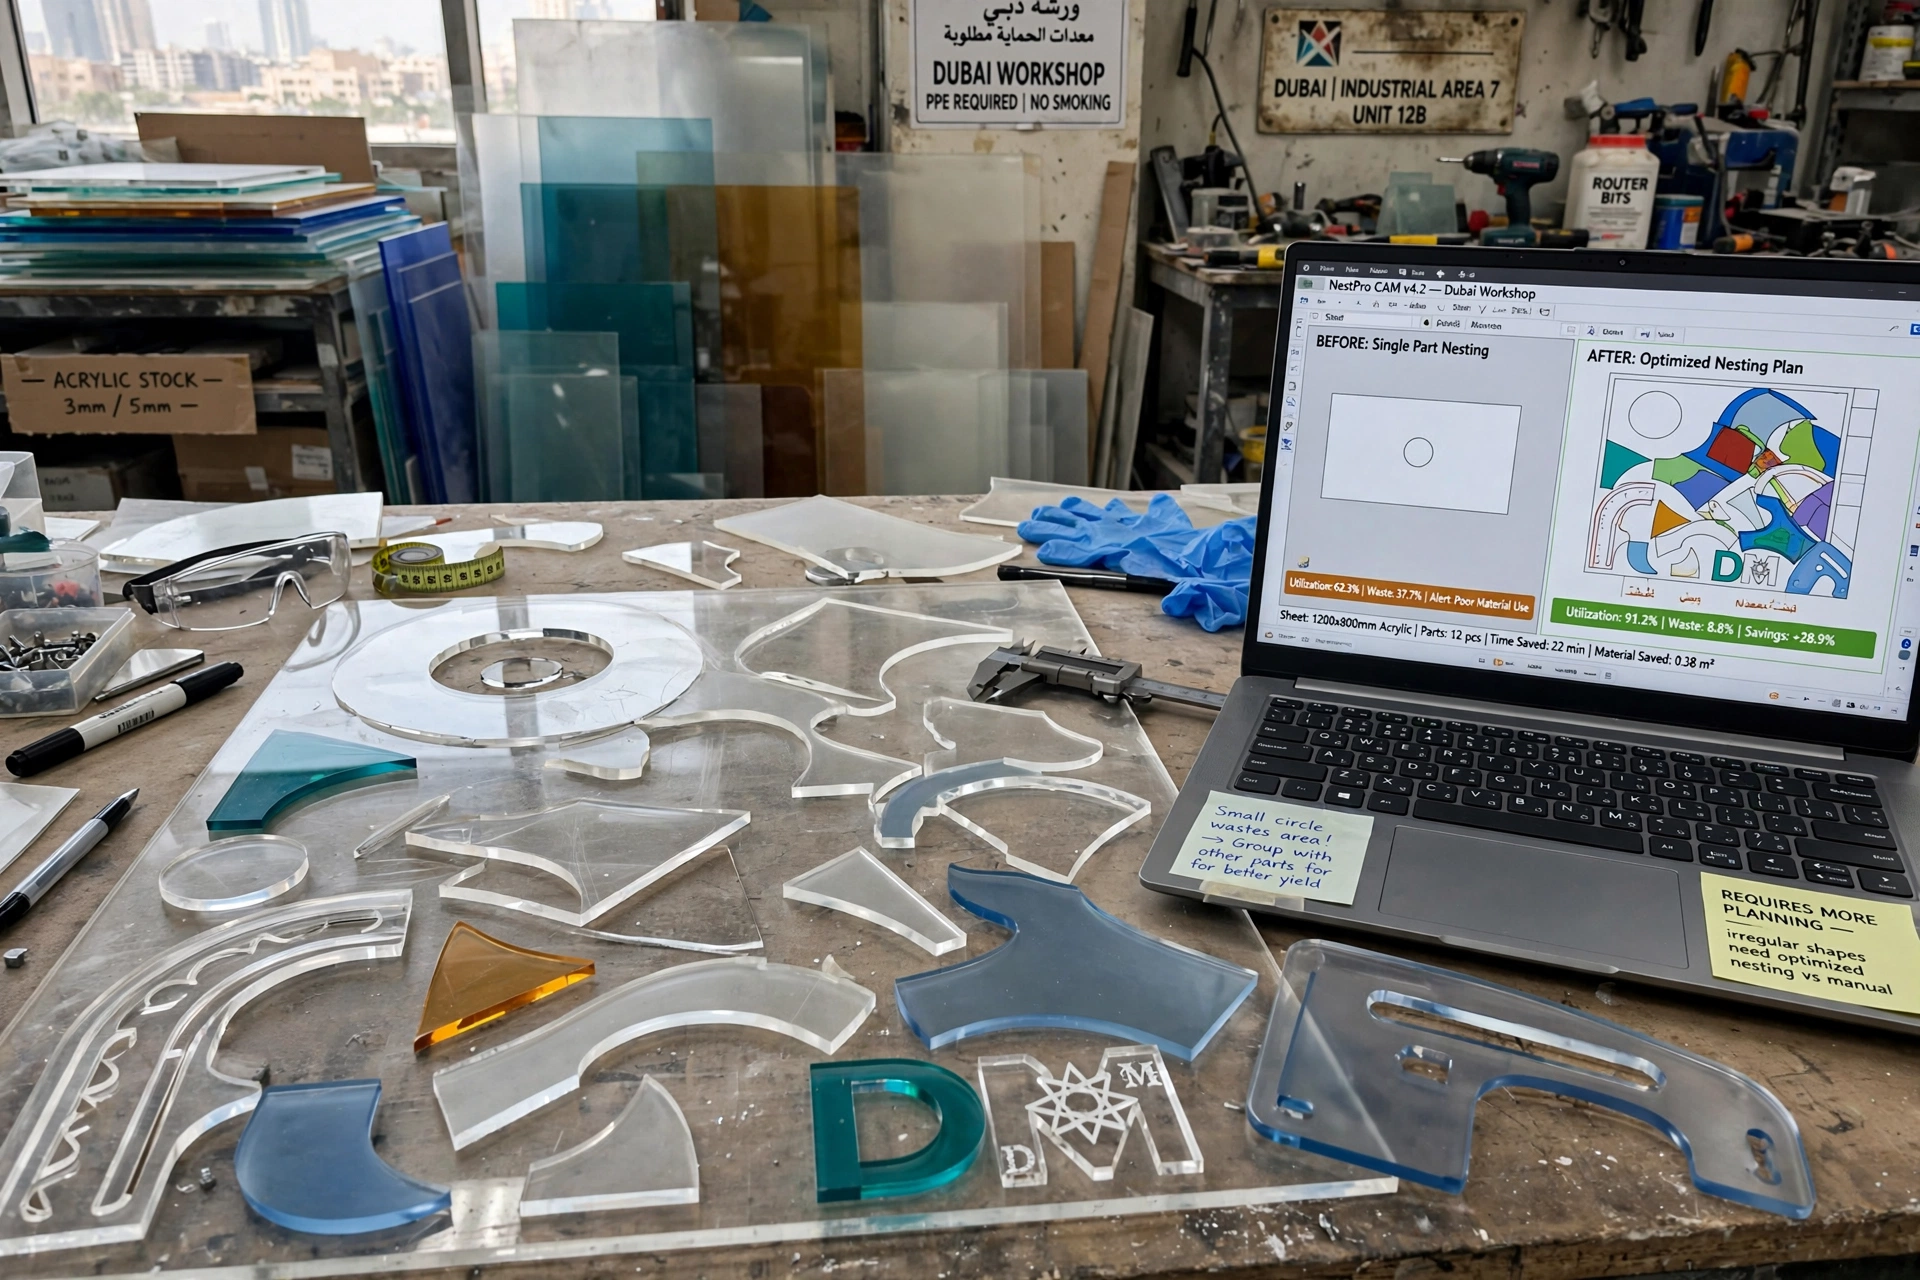
Not every acrylic component is rectangular.
Projects can include:
- Circles
- Arcs
- Curved panels
- Triangles
- Custom logos
- Letters
- Decorative shapes
- Machine guards
- Architectural forms
For irregular components, total area alone becomes even less useful.
A small circular component may occupy relatively little area but still generate substantial unused space around it when cut from a rectangular sheet.
Nesting software or professional CAD/CAM planning can help improve material utilization.
Acrylic Letters and Signage
Acrylic is widely used for signage, dimensional lettering, illuminated signs, reception signs, retail branding, and wayfinding.
When calculating material requirements for letters, the total surface area of the letters does not necessarily tell you how many sheets are needed.
The letters need to be arranged physically on the sheet.
Spacing between individual characters and the cutting method also need to be considered.
Large letters may require a different sheet layout from small repeated letters.
Acrylic for Retail Displays
Retail displays often contain multiple panels and components.
A display might require shelves, dividers, side panels, back panels, headers, and decorative elements.
The most efficient approach is to prepare a complete component schedule before purchasing material.
The fabricator can then determine how the pieces can be arranged across available sheets.
This can reduce the number of sheets required while keeping the production process organized.
Acrylic for Partitions and Screens
Acrylic partitions and protective screens often involve relatively large rectangular panels.
For these applications, sheet dimensions and installation access are particularly important.
A large panel may fit the required wall opening but still be difficult to transport through a building.
Elevator dimensions, door openings, staircases, corridors, and installation locations should therefore be considered before selecting the sheet size.
Acrylic for Exhibition and Display Structures
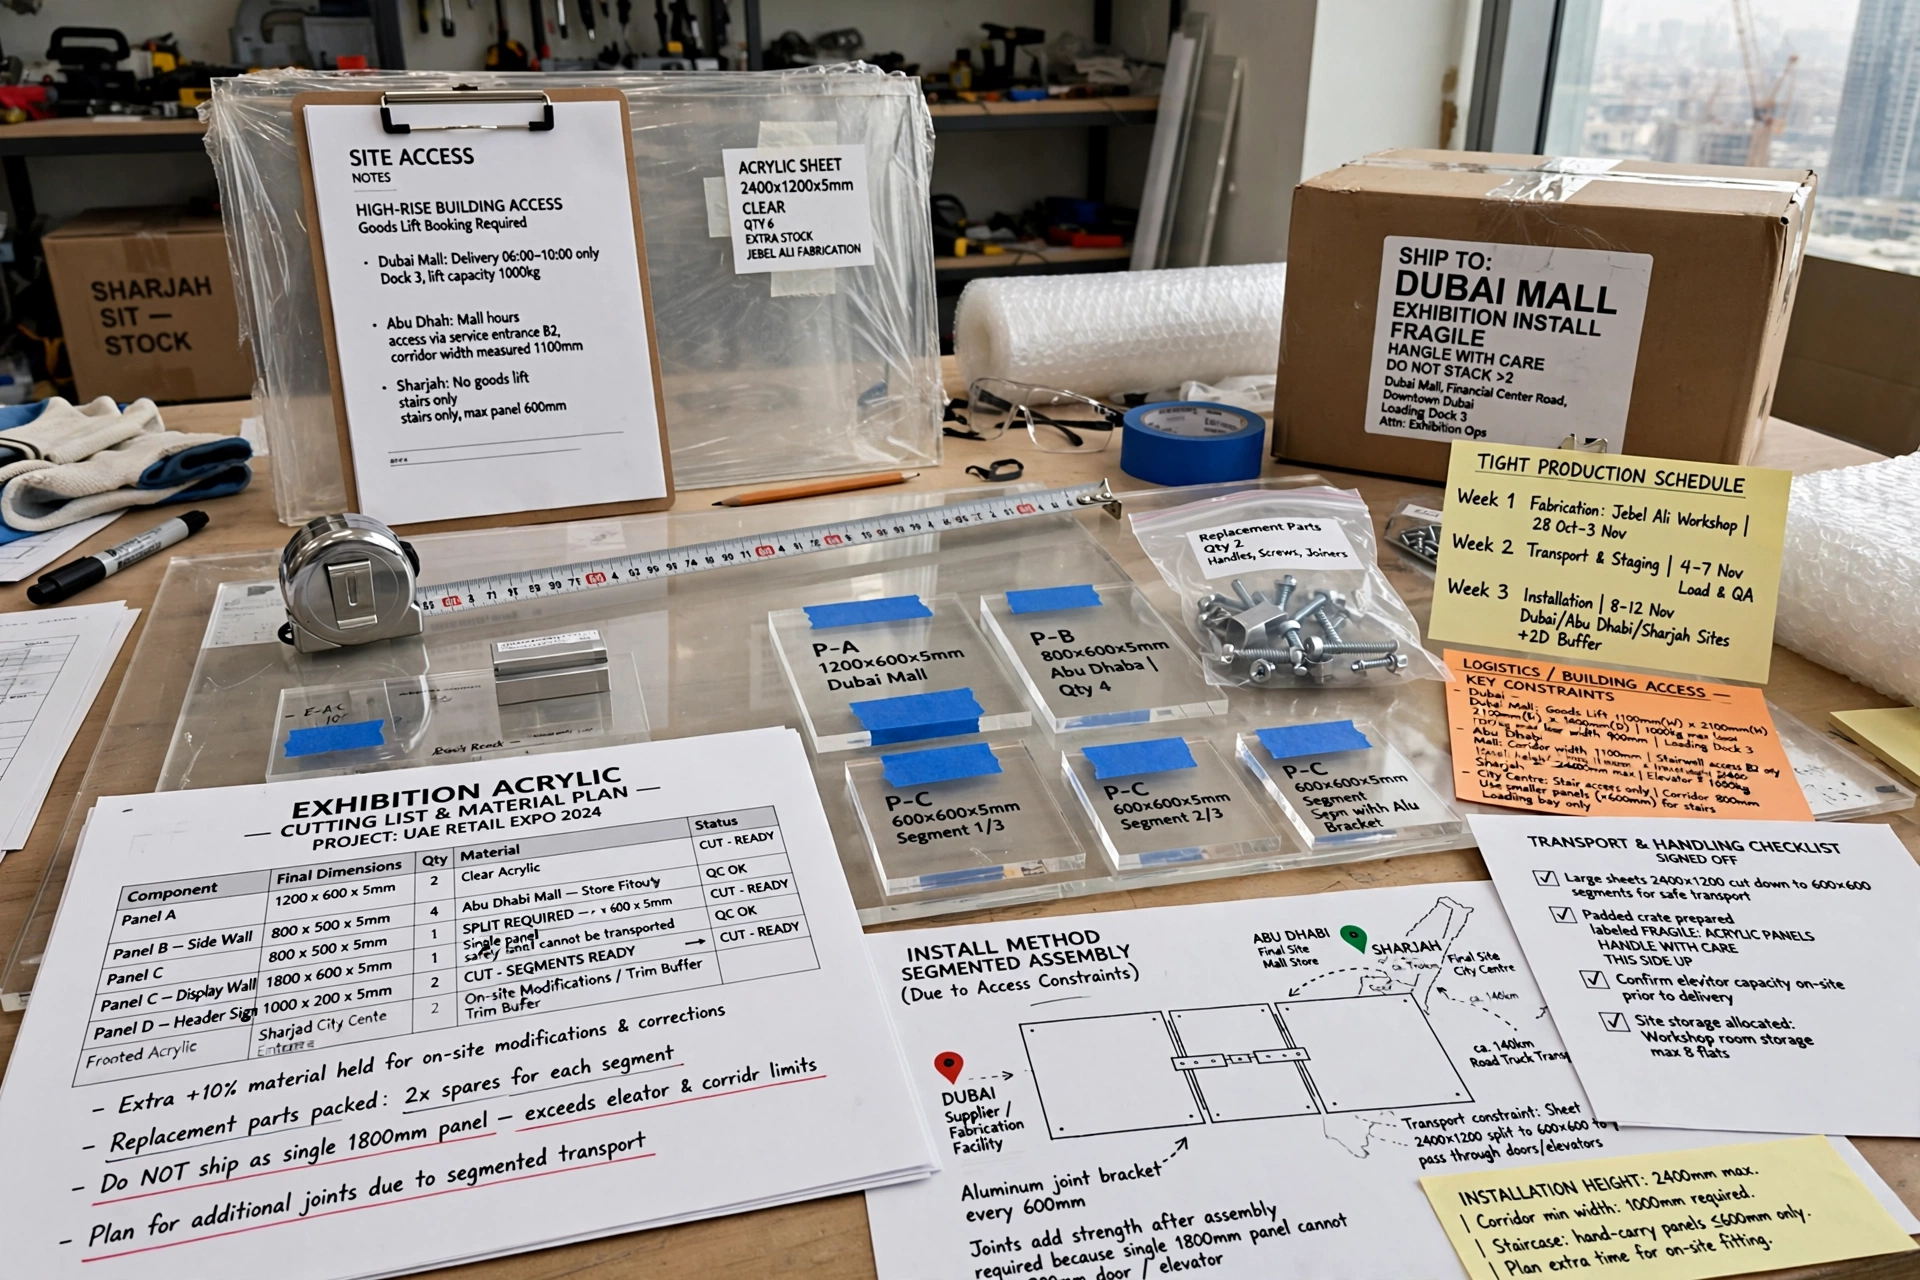
Exhibition components may include many different acrylic parts.
Because exhibition projects often have tight production schedules, accurate material planning is particularly important.
A cutting list should include every component and its final dimensions.
Extra material may also be appropriate when the project involves on-site modifications or replacement parts.
Transportation Can Affect Sheet Quantity
Large acrylic sheets require careful transportation and handling.
A sheet that is physically suitable for a project may not be practical to transport or move into the installation area.
For projects in Dubai, Abu Dhabi, Sharjah, and other UAE locations, the logistics of moving large panels between the supplier, fabrication facility, workshop, and final site should be considered.
Building access can be especially important for commercial projects in high-rise buildings and shopping centres.
Building Access and Installation Constraints
Before ordering large sheets, check:
- Door dimensions
- Elevator capacity
- Staircase access
- Corridor width
- Loading areas
- Installation height
- Site storage space
Sometimes a project requires smaller panels or additional joints simply because a single large panel cannot be safely transported into the building.
The final sheet requirement should therefore consider the installation method, not just the finished dimensions.
Account for Replacement Pieces
For important commercial projects, ordering only the exact theoretical quantity can create unnecessary risk.
If one component is damaged during fabrication, transportation, or installation, there may be no spare material available.
A small additional quantity may therefore be practical for projects involving expensive installation, tight deadlines, or difficult-to-replace components.
The appropriate quantity depends on the project’s risk and the availability of replacement material.
Use a Cutting List Before Ordering
A detailed cutting list is one of the simplest ways to improve accuracy.
A useful cutting list can include:
| Component | Length | Width | Quantity | Thickness |
|---|---|---|---|---|
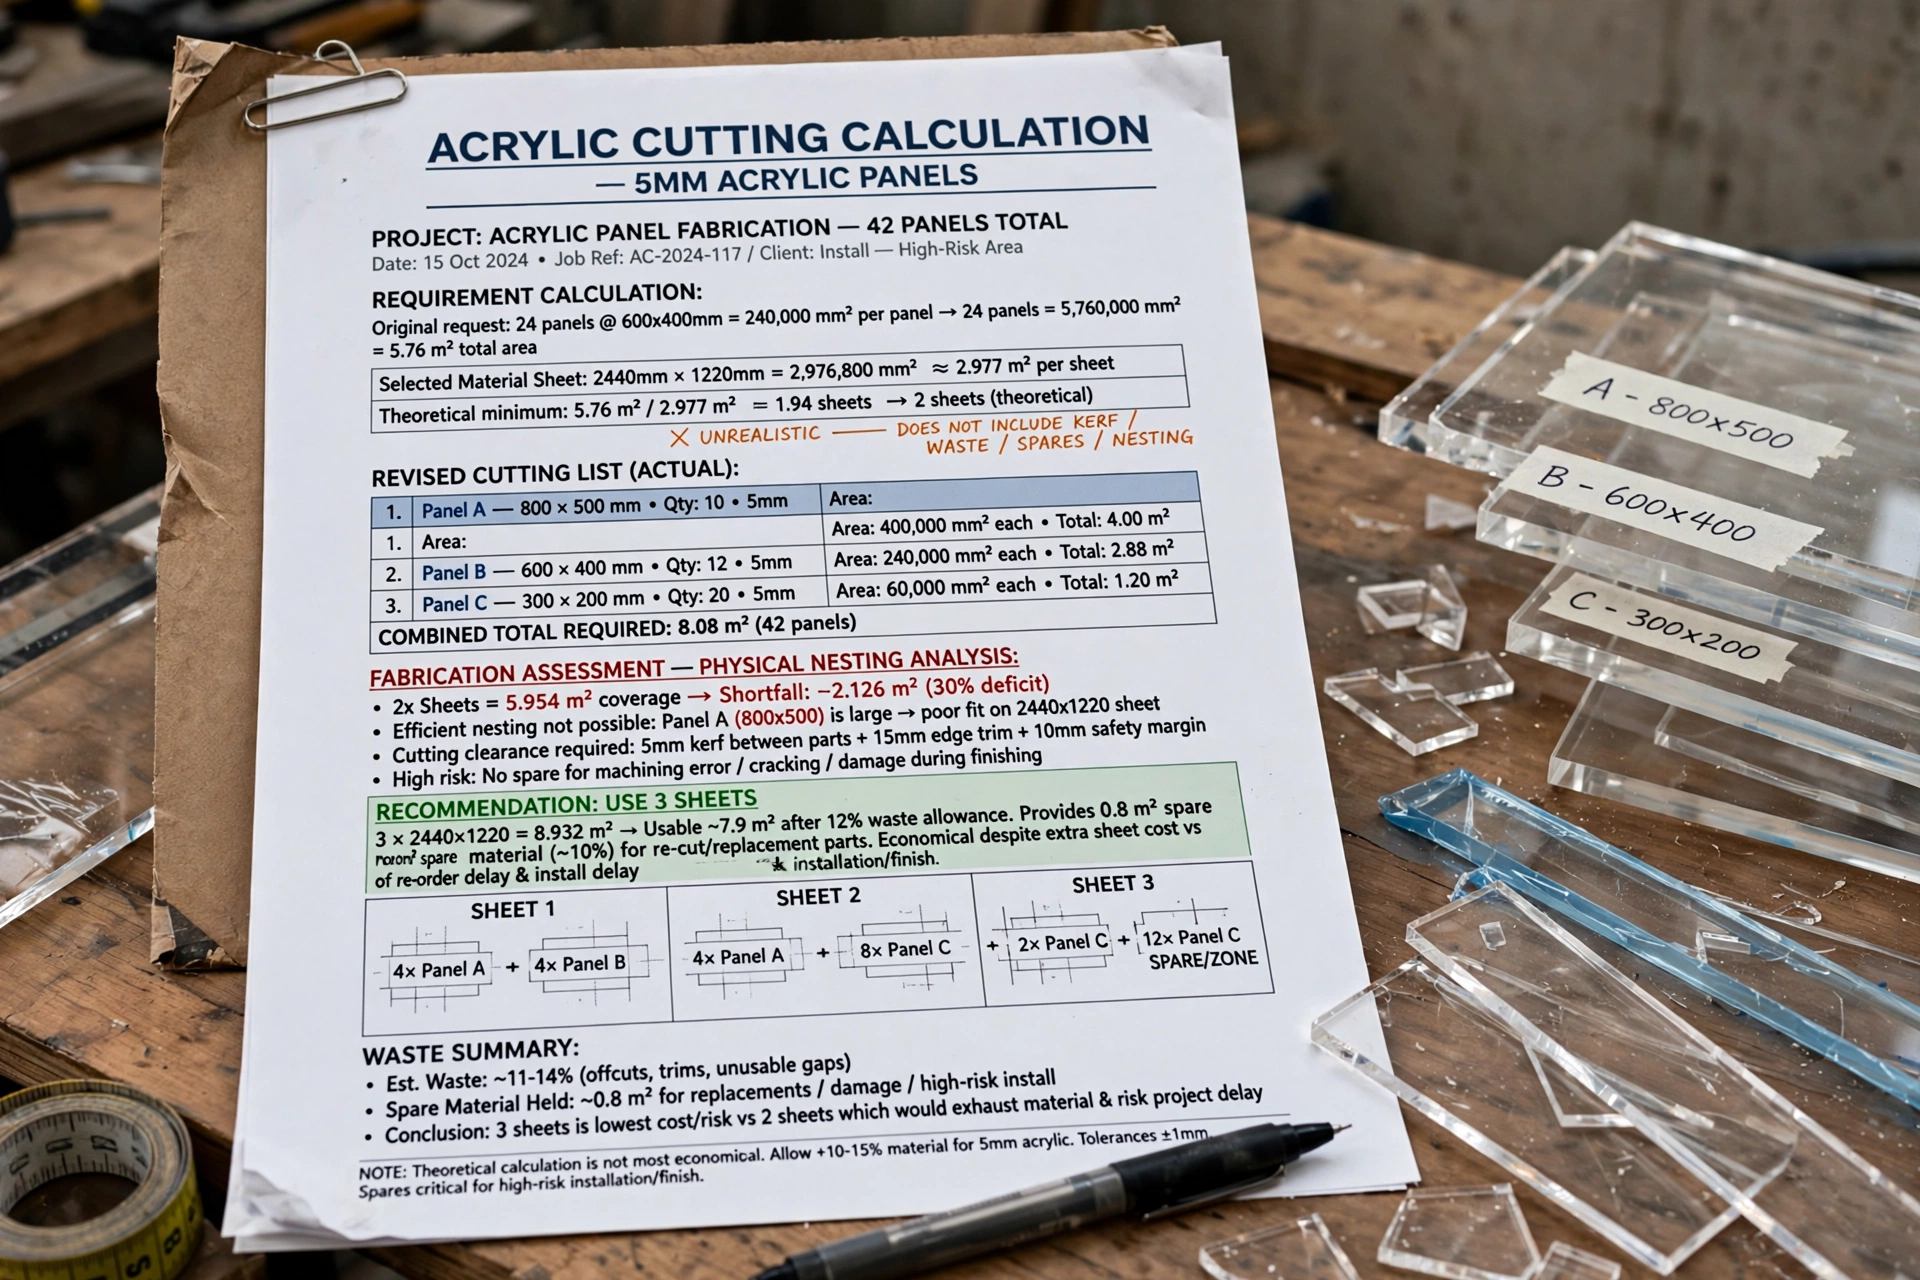
| Panel A | 800 mm | 500 mm | 10 | 5 mm |
| Panel B | 600 mm | 400 mm | 12 | 5 mm |
| Panel C | 300 mm | 200 mm | 20 | 5 mm |
The fabricator can then create a sheet layout based on the complete list.
This is particularly useful when a project contains many different component sizes.
A Simple Calculation Example
Consider a project requiring 24 acrylic panels measuring 600 × 400 mm.
Area of one panel:
600 × 400 = 240,000 mm²
Area of 24 panels:
240,000 × 24 = 5,760,000 mm²
This equals:
5.76 m²
Suppose the selected sheet is 2,440 × 1,220 mm.
Sheet area:
2,440 × 1,220 = 2,976,800 mm²
Approximately:
2.977 m² per sheet
The theoretical number of sheets is:
5.76 ÷ 2.977 ≈ 1.94
The area calculation therefore suggests two sheets.
However, the fabricator should still verify the physical nesting pattern, cutting clearance, and practical waste before confirming two sheets as the final requirement.
When Three Sheets May Be Better Than Two
Sometimes purchasing an additional sheet can be more practical even when two sheets theoretically contain enough material.
This can happen when:
- The cutting layout creates excessive waste
- Components cannot be efficiently nested
- Large pieces leave unusable gaps
- Extra replacement parts are required
- The installation is high-risk
- The material has a specific finish
- Fabrication tolerances require additional allowance
The lowest theoretical sheet count is not always the most economical project solution.
How CAD and Nesting Software Help
Professional fabrication companies can use CAD and nesting software to arrange components digitally before cutting.
The software can account for component dimensions and organize pieces to improve material utilization.
This is particularly valuable for projects involving:
- Numerous components
- Irregular shapes
- Custom signage
- Complex displays
- Architectural panels
- Repeated production runs
A digital layout can also help confirm whether a particular sheet size is suitable before material is purchased.
Standard Sheets vs Custom Sheets
The best sheet size is not always the largest available sheet.
Standard sheets can be convenient and economical, while custom dimensions may reduce cutting and handling requirements for specific projects.
The choice depends on the project’s component dimensions, quantity, fabrication method, transportation, and installation conditions.
A professional acrylic supplier can help compare the practical options.
Choosing Acrylic Sheet Thickness Alongside Quantity
Material quantity should not be separated completely from thickness.
A project may require different thicknesses for different components.
For example, a display may use thinner acrylic for small dividers but thicker acrylic for large structural panels.
Each thickness should generally be calculated separately because sheets cannot simply be combined into one material quantity when their specifications differ.
Clear, Coloured and Specialty Acrylic Sheets
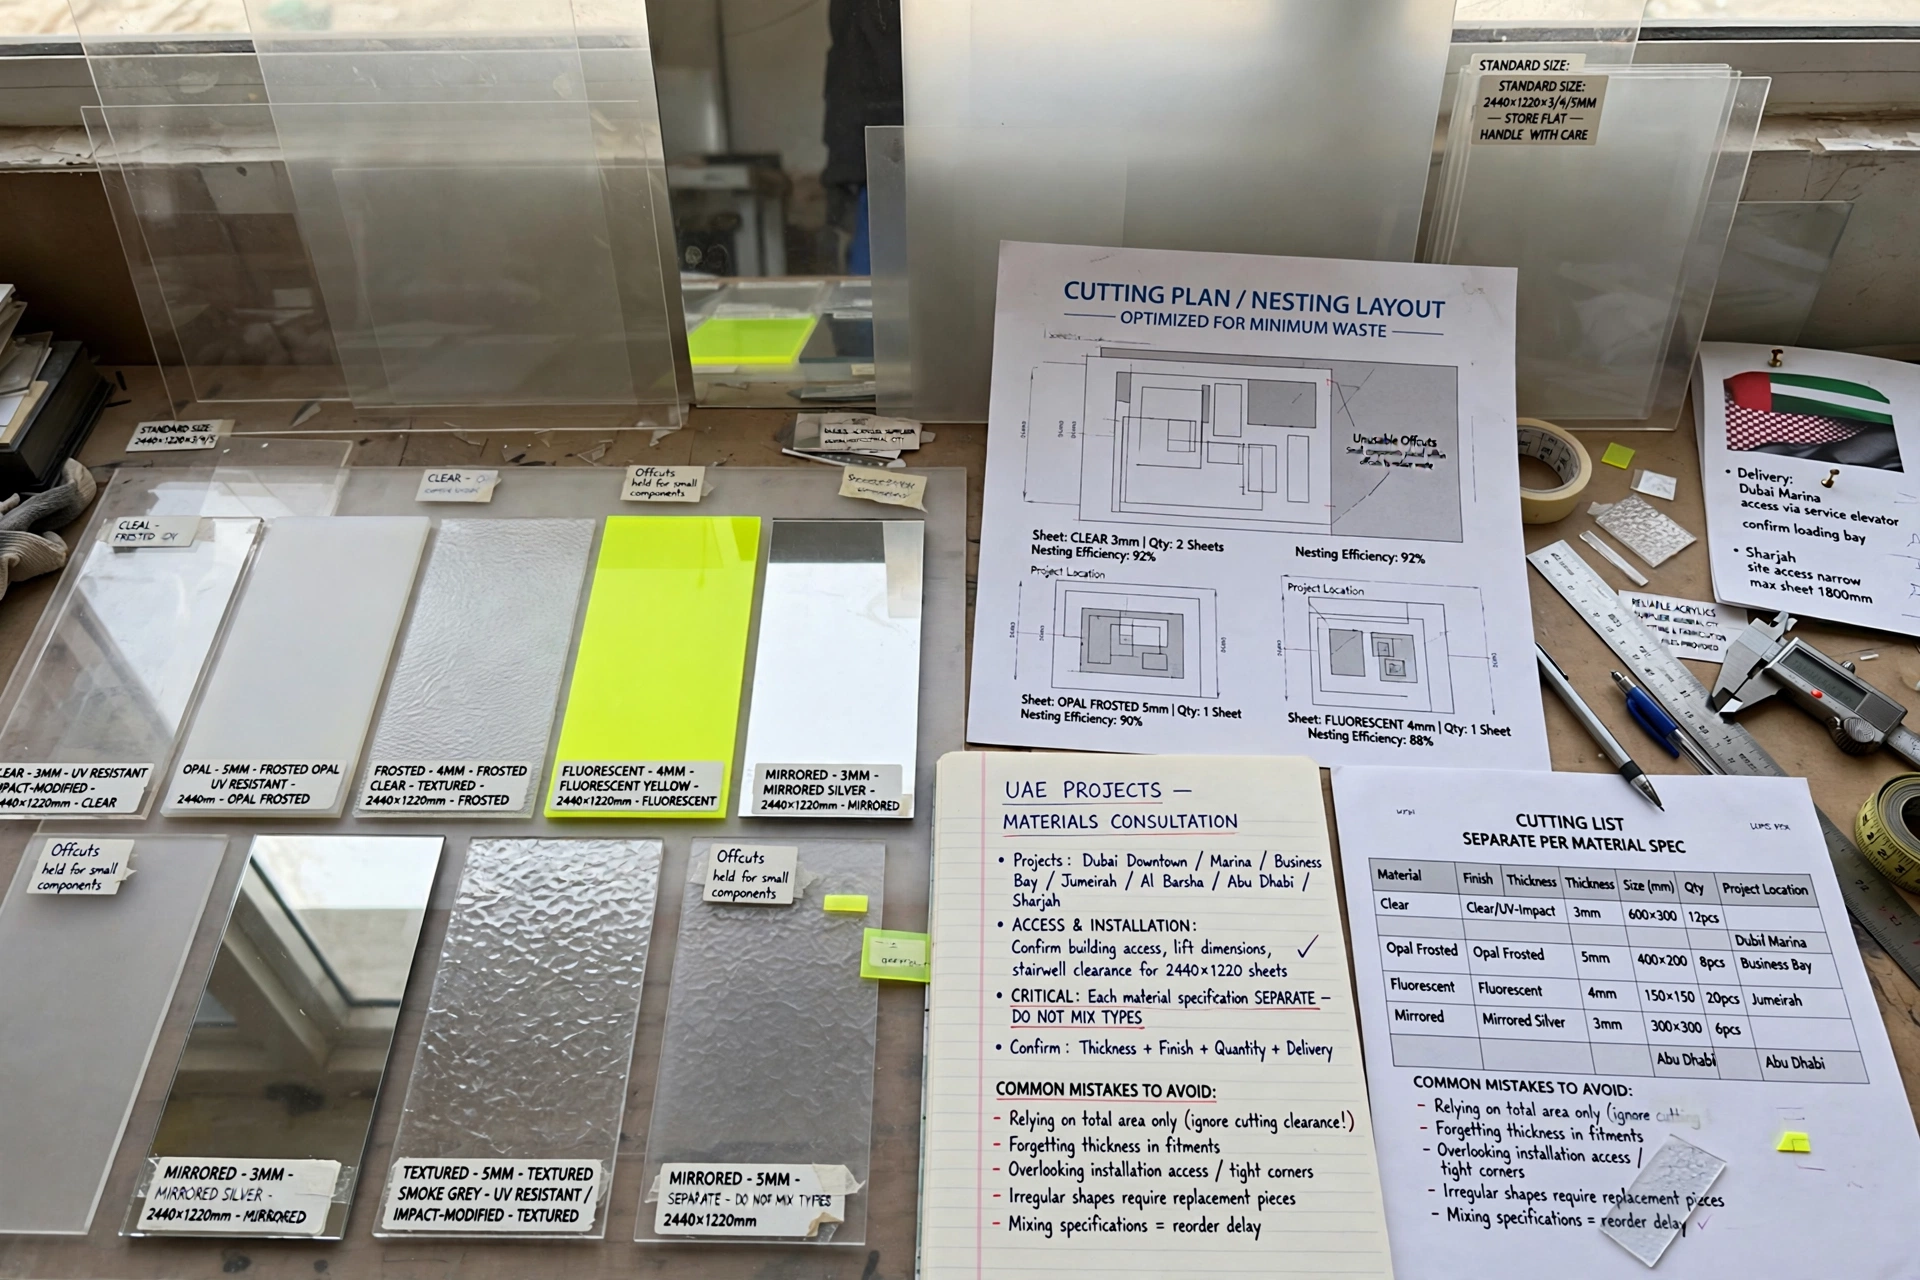
Acrylic is available in various finishes and types.
These can include:
- Clear acrylic
- Opal acrylic
- Frosted acrylic
- Coloured acrylic
- Fluorescent acrylic
- Mirrored acrylic
- Textured acrylic
- UV-resistant grades
- Impact-modified acrylic
If a project specifies a particular material or finish, surplus material from another type cannot necessarily be substituted.
The cutting plan should therefore be prepared separately for each required material specification.
How to Reduce Acrylic Sheet Waste
Material efficiency begins before cutting.
Accurate measurements, standardized component sizes, thoughtful sheet selection, efficient nesting, and careful handling can all reduce waste.
Where possible, components with similar dimensions can be grouped together.
Small components can sometimes be positioned within spaces that would otherwise become unusable offcuts.
A professional fabricator can optimize these layouts before production begins.
Ordering Acrylic Sheets for UAE Projects
For projects in the UAE, material planning should consider both fabrication and logistics.
Large acrylic sheets may need to move between suppliers, workshops, warehouses, and construction or retail sites.
Projects in Dubai Downtown, Dubai Marina, Business Bay, Jumeirah, Al Barsha, Abu Dhabi, Sharjah, and other commercial areas can have different access and installation conditions.
Before ordering, confirm the sheet dimensions, thickness, finish, quantity, cutting requirements, and delivery arrangements.
Working With an Acrylic Sheet Supplier
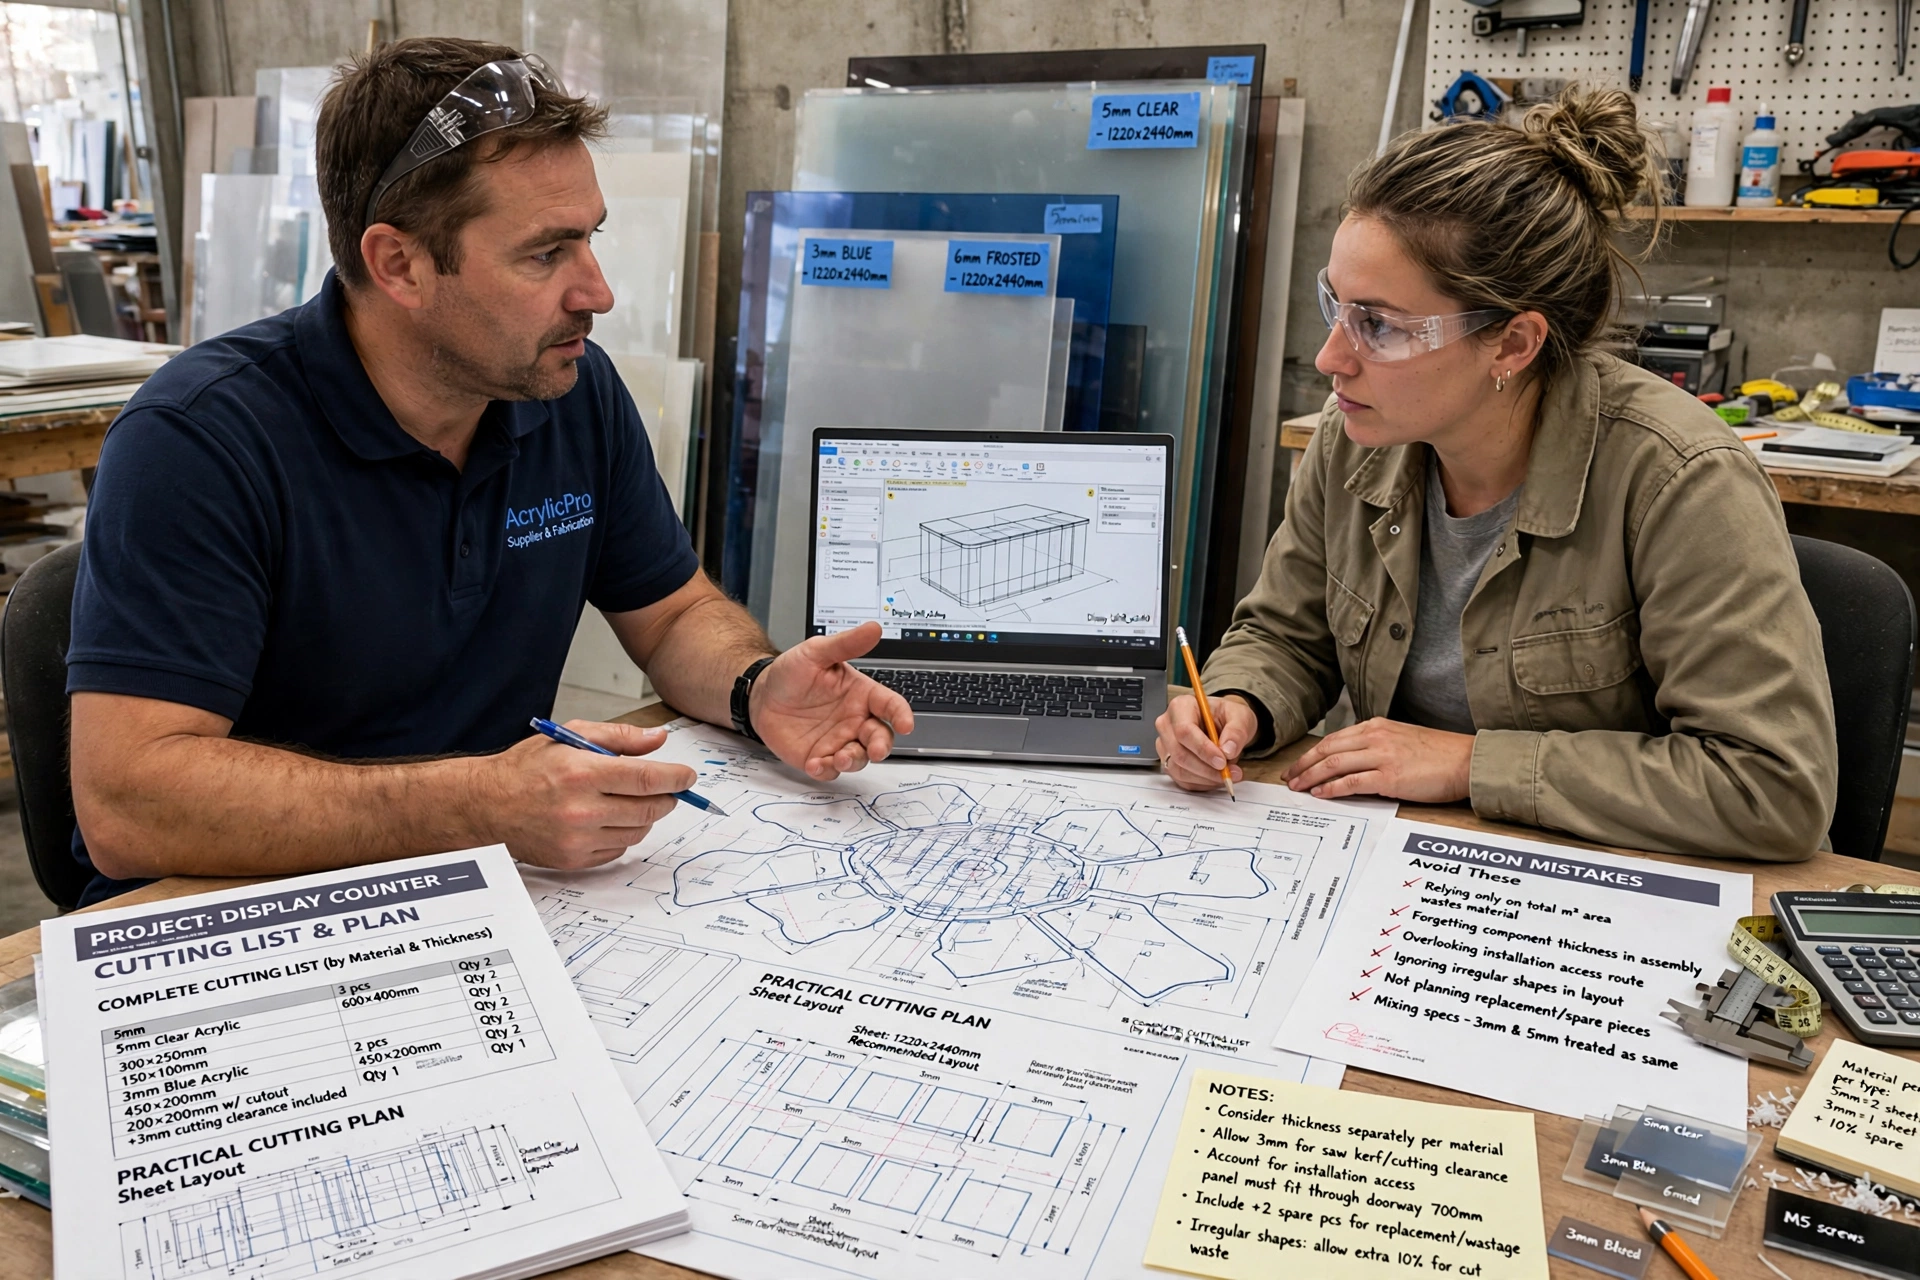
A reliable supplier can help determine the most practical material quantity based on the project requirements.
Rather than providing only the total square-metre requirement, share the complete cutting list.
This allows the supplier or fabricator to evaluate sheet dimensions and create a practical cutting plan.
For complex projects, provide drawings or CAD files when available.
Common Mistakes When Calculating Acrylic Sheets
One of the most common mistakes is relying entirely on total area.
Other mistakes include ignoring cutting clearance, forgetting component thickness, overlooking installation access, failing to account for irregular shapes, and not planning for replacement pieces.
Another common mistake is mixing different acrylic specifications into one calculation.
Each material type and thickness should be considered separately when necessary.
A Practical Formula for Estimating Sheet Quantity
For simple rectangular projects, a basic starting calculation is:
Number of sheets = Total required material area ÷ Area of one sheet
The result should then be rounded up to the next whole sheet.
However, this is only a preliminary estimate.
The final quantity should be confirmed through physical nesting and consideration of cutting losses, offcuts, component orientation, fabrication tolerances, and project-specific requirements.
When Professional Material Planning Is Recommended
Professional material planning becomes particularly useful when the project involves expensive acrylic, large panels, complex shapes, tight tolerances, or a large number of components.
A fabricator can review drawings, prepare a cutting list, optimize sheet layouts, and identify potential production issues before cutting begins.
This can save both material and production time.
Frequently Asked Questions
How do I calculate how many acrylic sheets I need?
Calculate the area of the required components, calculate the area of the selected acrylic sheet, and divide the total required area by the sheet area. Then round up and verify the result using an actual cutting layout.
Is dividing the total area by sheet area enough?
No. Area calculations provide a useful estimate, but the physical arrangement of components, cutting clearance, irregular shapes, offcuts, and installation requirements can change the actual sheet quantity.
Should I include extra acrylic sheets?
For some projects, yes. Additional material can provide a useful allowance for fabrication errors, damaged components, installation adjustments, or replacement pieces. The appropriate allowance depends on the project.
Does acrylic thickness affect the number of sheets?
Thickness does not normally change the two-dimensional area calculation, but it affects cost, weight, handling, fabrication, strength, and application requirements. Different thicknesses should generally be calculated separately.
Can acrylic offcuts be reused?
Yes, provided the offcut is large enough, undamaged, and has the correct material type, colour, finish, and thickness for the next component.
How can I reduce acrylic waste?
Use accurate dimensions, choose suitable sheet sizes, optimize the cutting layout, group compatible components, consider component orientation, and use professional nesting where appropriate.
Conclusion
Calculating the number of acrylic sheets required for a project begins with simple measurements but should ultimately involve a much more detailed material-planning process.
Start by identifying every component, recording its finished dimensions, thickness, material type, and quantity. Calculate the theoretical area, determine the available sheet dimensions, and then create a physical cutting layout. From there, consider cutting clearance, component orientation, offcuts, irregular shapes, transportation, installation access, and potential replacement requirements.
For straightforward rectangular projects, the area-based calculation can provide a useful starting point. For complex commercial, architectural, retail, signage, exhibition, or fabrication projects, however, professional nesting and cutting-layout planning can provide a much more accurate result.
Whether the project is located in Dubai, Abu Dhabi, Sharjah, Ajman, or elsewhere in the UAE, the most efficient approach is to plan the complete material requirement before ordering. Providing a detailed cutting list or fabrication drawing to an experienced acrylic supplier can make it easier to determine the appropriate sheet dimensions and quantity.
Ultimately, calculating the Acrylic Sheets Needed for a Project is not simply about dividing one area by another. It is about balancing material efficiency, fabrication accuracy, handling, transportation, installation, and the specific requirements of the finished product. Proper planning at the beginning can reduce waste, control costs, and help the fabrication process move forward without unnecessary material shortages or delays.